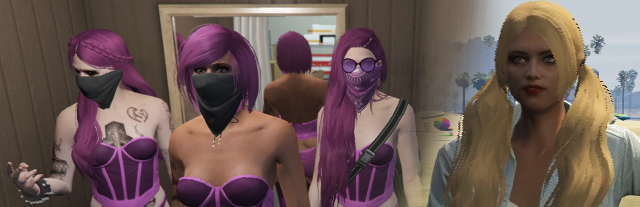
Do you want cool hairstyles for your server like the ones above? Are the current guides floating around too confusing for you? Follow these instructions step by step and you too can have some cool hair mods!
Yes, this method can be applied to other things like tops, shoes, etc. But for the purpose of keeping things linear we’ll begin with hair.
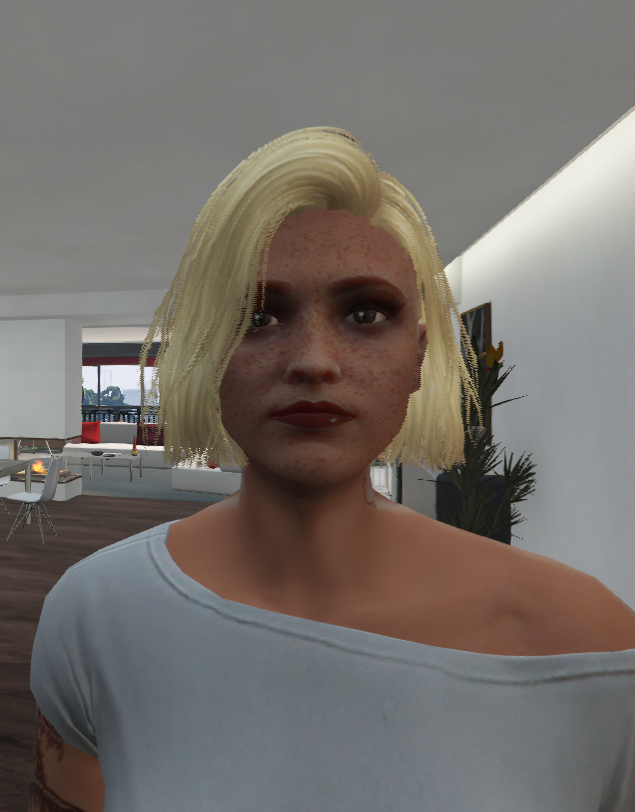
Note: The ones pictured are not publicly available, they are also not mine to give out. Please do not ask for them. I will link some free resources below.
Requirements for this tutorial:
A $15 or higher patreon tier to FiveM - THIS WILL NOT WORK WITHOUT IT
OpenIV
A programming app of your choice (I use Sublime)
Basic server building knowledge
Step 1: Finding a hairstyle you like
5mods has some great resources available that can be used for multiplayer characters. Make sure you check that they are specifically for multiplayer or ‘freemode’ characters. You can find plenty of these on GTA-5 mods. GTA 5 Player Mods - GTA5-Mods.com
For this tutorial I have selected the ‘bob haircut’ by -CREATIONS- (however, since creating this tutorial it’s been taken down, you’ll be fine using a different style) and I have downloaded and unzipped the files to their own folder for me to work on. The contents should look like this:

Disregard the readme file as that tells you how to install the hair for singleplayer - we need this for a server.
Step 2: Finding a hairstyle you hate that’s already in the game to replace.
Using this super handy website we can take a look at the files already in GTA5’s base game and the location of them within the game files. Open that website, select the correct checkbox for the gender of the hair you’re replacing and make sure ‘hair’ is the only category ticked. A bunch of hairstyles will pop up but the screenshots look a little funky - most don’t look exactly how they do in game, which can make it hard. But you can make adjustments later. Try not to select a style that your server users may enjoy using.
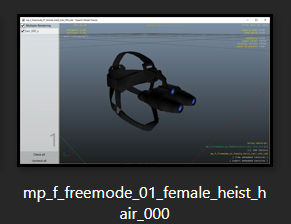
For this tutorial, I’ve decided to replace the heist goggles. It’s weird they’re considered a ‘hairstyle’ and are kinda taking up space. So lets fix this!
Step 3: Double checking your files and learning to navigate OpenIV.
Measure twice, cut once. Same goes for uploading streaming assets. We’re going to go into OpenIV and click file then open folder - navigate to the folder where you downloaded your haircut to.
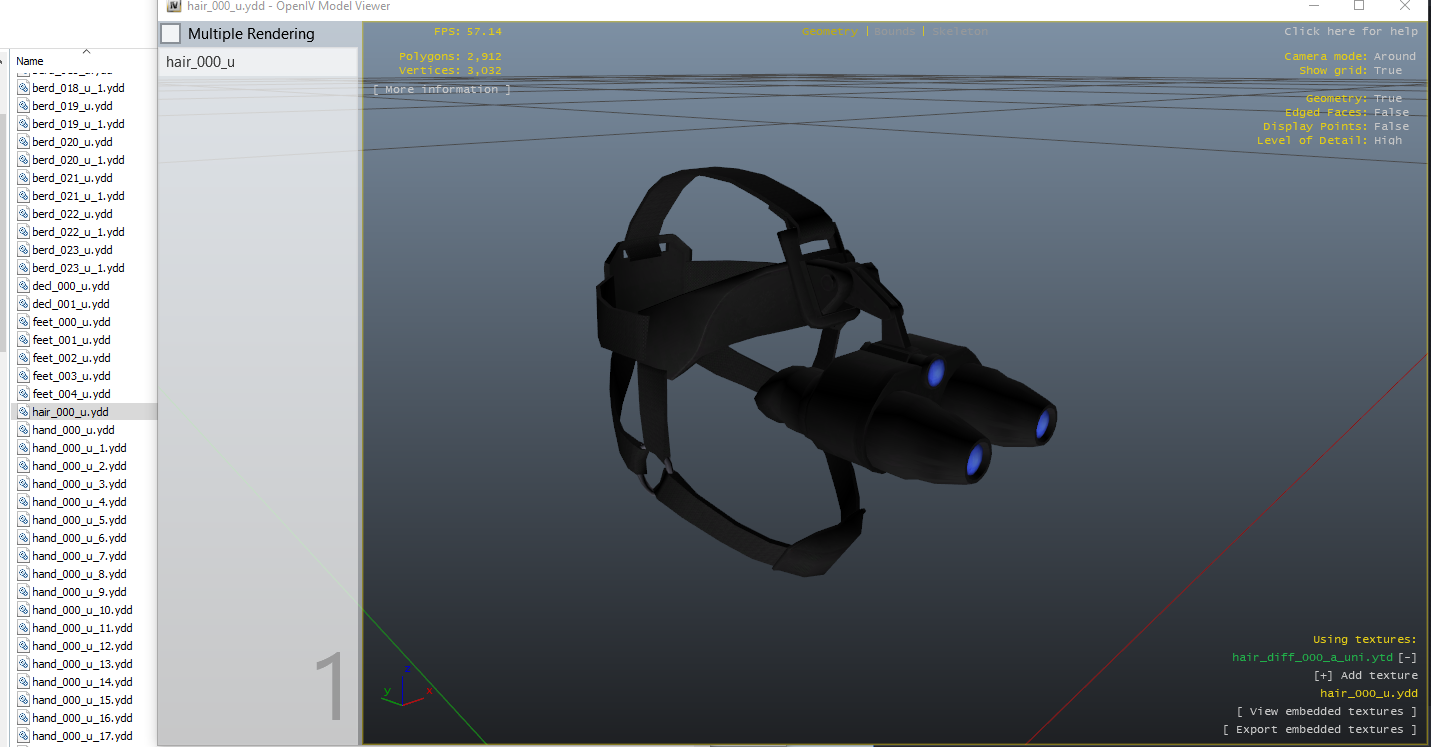
There are two files in the folder that matter to us. a YDD and YTD - a YDD file indicates it’s the model - the shape of the hair. The YTD is a texture dictionary - it’s where the hair’s texture is. Double click on the YDD file to open it up and make sure it’s what you want in your server and that it looks okay - that there are no glaring bugs with the model. Opening it makes it look like this:
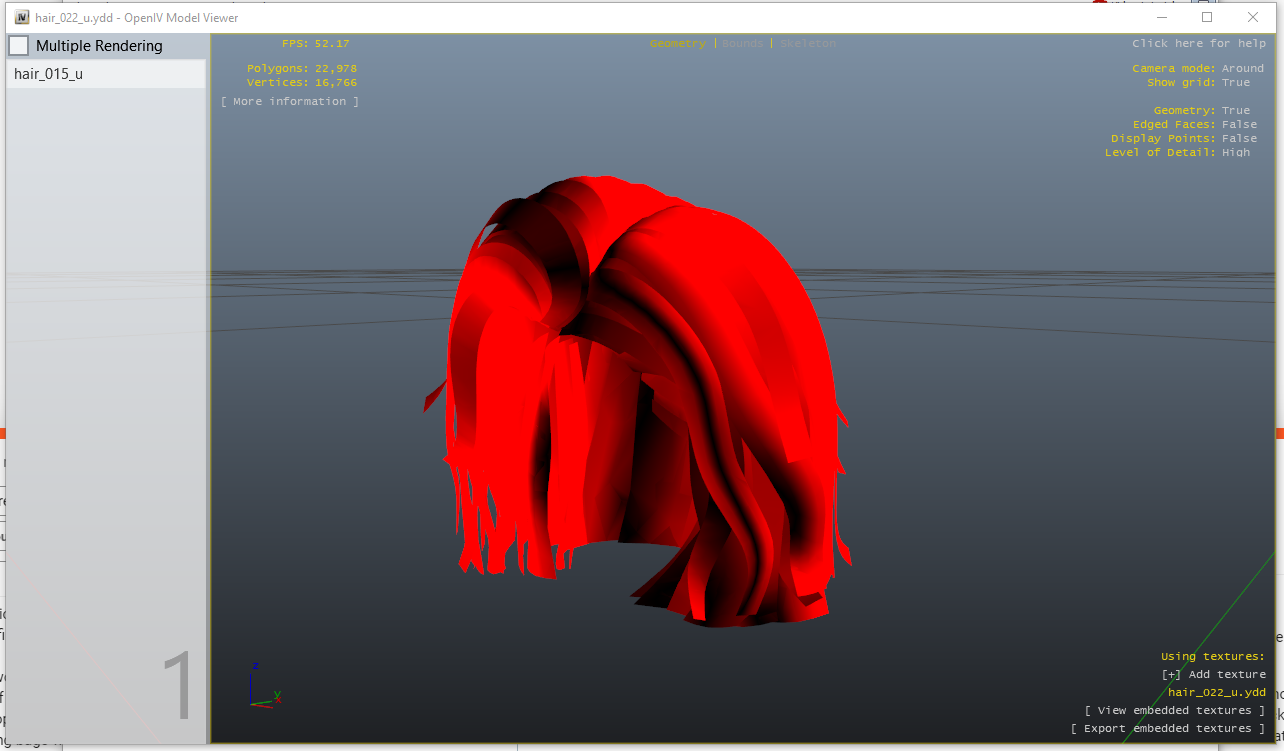
Don’t worry that the hair is a weird colour like this bright red or orange or white - that’s normal for looking at them in openIV.
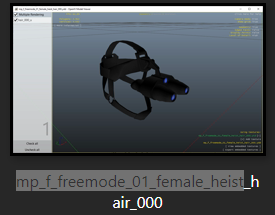
Next we’ll check on the hair you’ve decided to replace - or in our case, the goggles. Go back to that website where you found the hair and copy the section highlighted. We’ll ignore the hair(number) part for now.
Paste it into the OpenIV search bar in the top right hand side of the OpenIV window. In the middle of the window it may say ‘No items match your search’ but just press the button that says 'search (the search input).

A new window will pop up. Let it search and once it’s done navigate to a folder that matches exactly the name of what you searched and does not include the word ‘patchday’ in it’s location. Here you can see the correct folder is highlighted - and there are red X’s next to examples of what you don’t want to go into. Double click the right one and go into it.
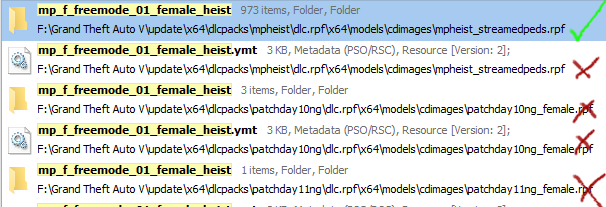
Inside will be a list of the clothing, hairstyles, masks and more that that DLC added to GTA. Scroll down to the ‘hair’ files and navigate to the hair you chose. In this case, we chose hair_000 - so we find and open that file and make sure it’s the right one. In the below picture you can see the file names on the left with the correct one highlighted and the opened window on the right, showing that we got our file name correct.
Step 4: Renaming your files and preparing them for upload.
To make an asset streamable you effectively need to edit the name of the file itself to override that slot. The format is like the below:
(Folder Hair is in)^(File name)
For example:
mp_f_freemode_01_mp_f_bikerdlc_01^hair_000_u.ydd
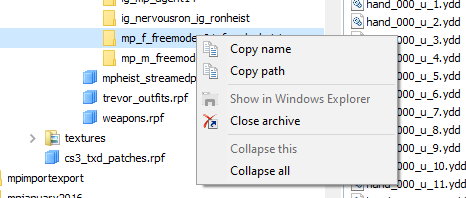
Without naming your file correctly it will not load into your server at all. An easy way to do this can be done using openIV. We can copy the names of the folder and file directly from open IV. Right click the name of the folder and click ‘copy name’ as pictured.
And paste that name into a text program - like notepad. Add a ‘^’ after the file name. So so far we have: mp_f_freemode_01_female_heist^
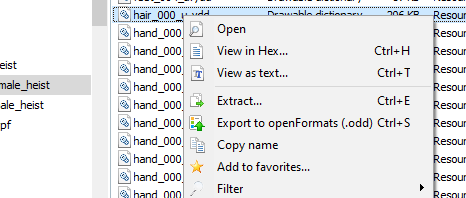
Next, right click the file and press ‘copy name’ and paste that after what you’ve already done.
So now we have: mp_f_freemode_01_female_heist^hair_000_u
Now scroll down in OpenIV and do the same for the texture dictionary (YTD) file. These are below the YDD files. You can see it is named slightly different but the ‘Hair’ and 3 digit number is still there so it’s easy to tell what you need to copy.

For the texture dictionary (YTD) file we now have the below:
mp_f_freemode_01_female_heist^hair_diff_000_a_uni
Great! So now you have the file names. Make sure they do not have .ydd or .ytd on the end of them. Go back to where you downloaded the hairstyle and rename the YDD and YTD files respectively to the names you’ve made. Once you’re done they should look something like this:
![]()
Now make a new folder called ‘stream’ in this folder and drop the hairstyles into it. Delete the readme whilst you’re at it.
![]()
All we need to do now is make a lua file - a __resource.lua like you would see in any normal script. The only thing is it needs to be emtpy! Yup - empty. Just needs to be named ‘__resource.lua’ so just go into your programming editor of choice, make a lua file, write nothing in it and save it to the folder as ‘__resource.lua’ as below.

I renamed the folder that this folder and lua file sit in to a name I wanted to upload to my server. For the tutorial I called it ‘TutorialHair’

Step 5: Uploading to your server
Now you treat it like a script. Copy the whole file into your server resources and add the file to your server config. Restart your server or start the ‘script’ whilst in the server and quit to desktop then rejoin to see the changes.
Once you’re in game go to the barbershop, use /skin or whatever skin editing menu you use and look for the hair. Go slowly through the options until you find it. Can’t find it? Then you did it wrong - go back to the top of this tutorial and try again.
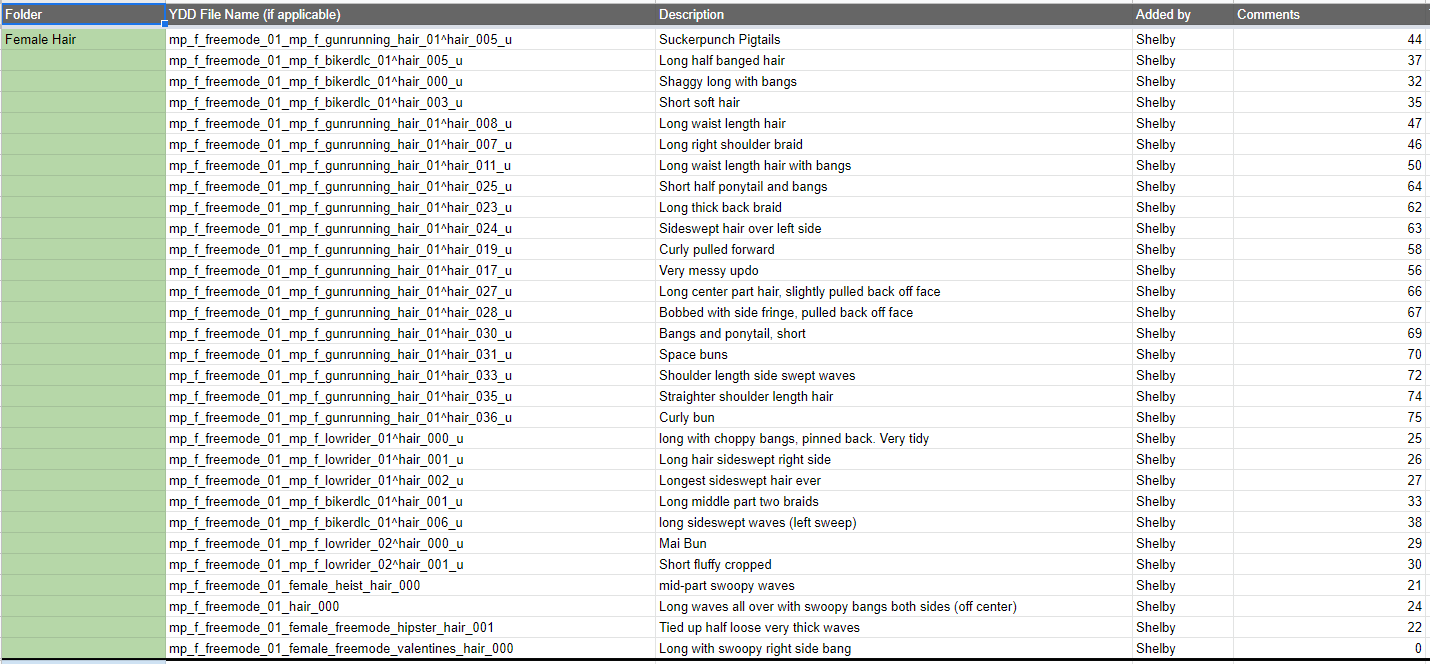
Found it? Then congrats - you’ve learned how to upload hairstyles! Once you’ve done the process a few times adding them becomes very easy, quick and second nature to you. If you’re going to add a lot of assets I suggest making a spreadsheet that tells you what slot you over-rode already, what you over-rode it with and the number hair slot it takes up in game. See below for examples on managing your resources and even some cheeky suggestions on slots to replace!
Good luck!
I won’t be able to provide individual support to you on this topic, the tutorial is comprehensive enough.

 Fan of your FiveM community work! tools like this are so welcomed but so uncommon.