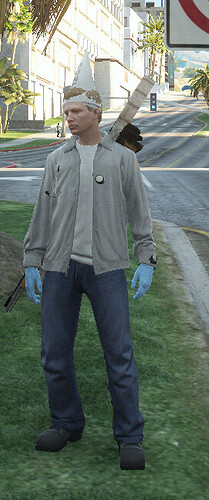
EDIT 15.10.2024
All images have been fixed, however I'd suggest to use my other project grzyClothTool to generate addon packs very easily.
Tutorial below was written when there was no such tool, and it involves manual work!
Hello, please read the whole topic, don’t skip steps, and read carefully.
In this tutorial it will be explained how to do addon clothes at the end of current clothes.Before I start explaining how to do anything, let me explain how i’m gonna call everything in this tutorial:
-
Component - There are 12 different components, each corresponds to a different number and a “slot” on our ped model. (head, berd, hair, uppr, lowr, hand, feet, teef, accs, task, decl, jbib)
-
Prop - There are 13 different prop slots, but only 5 are used in GTA (p_head, p_eyes, p_ears, p_lwrist, p_rwrist)
-
Drawable - Each .ydd is a different drawable, for example we are using one component with three drawables (jbib_000_u*, jbib_001_u* and jbib_002_u*), each drawable has a different number, starting at 0.
-
Texture - Each drawable can have up to 26 textures (a-z). Components and props have different structure how texture is named:
- Component texture name: xxxx_diff_###_(a-z)_uni*, for example: “jbib_diff_005_g_uni”
- Prop texture name: p_xxxx_diff_###_(a-z), for example: “p_head_diff_010_h”
-
.YMT - Extension of file which corresponds to how many components, drawables and textures the game will use.
*Each drawable can have suffix _u or _r, which stands for:
_u = universal
_r = race
It is important how we name our drawable, because we have to name texture properly too.
Each texture can have suffix _uni or _whi (or few different, most used is _whi)
_u = _uni
_r = _whi (or different one)
It will be explained later how to know if our drawable supports race.
Step 1
What will be needed?
YMTEditor https://github.com/grzybeek/YMTEditor/releases
OpenIV https://openiv.com
Few clothes which we want to use as add-ons
In tutorial i will use these three different mods:
https://www.gta5-mods.com/player/bandana-top-for-mp-female- https://www.gta5-mods.com/player/open-back-tank-top-for-mp-female
https://www.gta5-mods.com/player/colorful-pants-for-mp-female
Seems two mods are already removed from gta5mods
Step 2
Prepare files and YMTEditor
In YMTEditor you can create a new .ymt file, or open an already existing one to edit it, in the tutorial I will cover only creating new from scratch.
Open/Save (YMT) - opens a file with extension .ymt
Open/Save (XML) - opens a file with extension .ymt.xml (It can be exported/imported by Codewalker RPF Explorer)
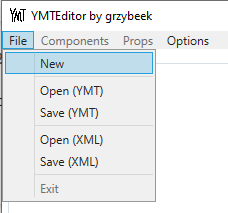
In the tutorial, we are going to click on New.
After clicking “New”, another window will pop up and we have to select for which MP character our .ymt will be done, for this tutorial I will choose female. Also, we have to type the name of our .ymt file, it can be whatever you want, and click submit.
Important: Your ymt name should be all lowercase!
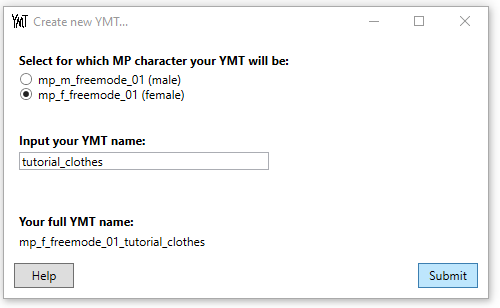
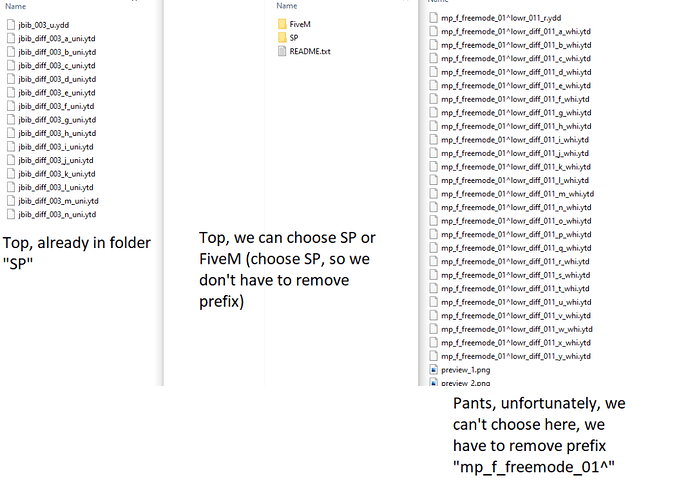
After that, we have to unpack our downloaded clothes, if downloaded files contains files for SP(Singleplayer) it will be easier to use them (we don’t have to delete prefix)
Let’s prepare our files completely and move them to one folder
I’ve removed the “mp_f_freemode_01^” prefix from pants(lowr), and changed their number from 011 to 000 - because we don’t have anything in our addon .ymt yet.
And changed from jbib_003 to jbib_000 and jbib_007 to jbib_001 - because we don’t have anything in our addon .ymt yet, those are the first two.
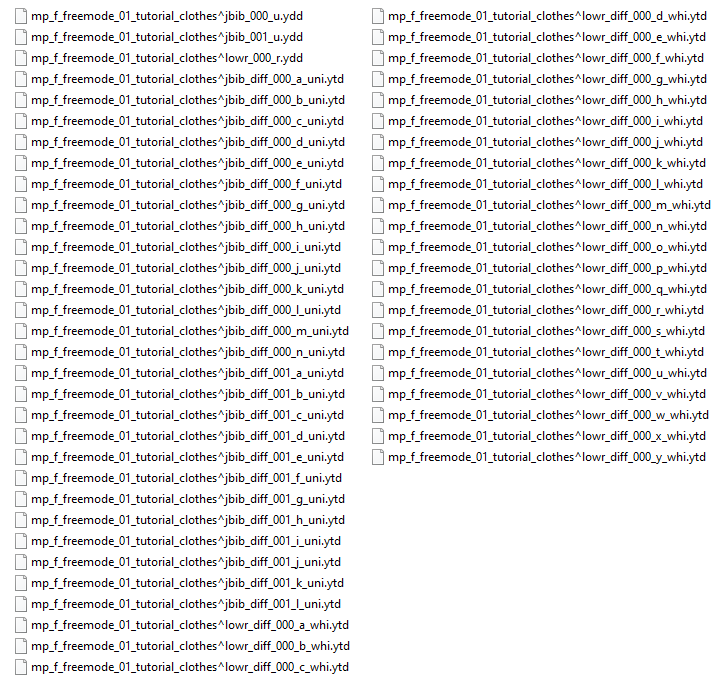
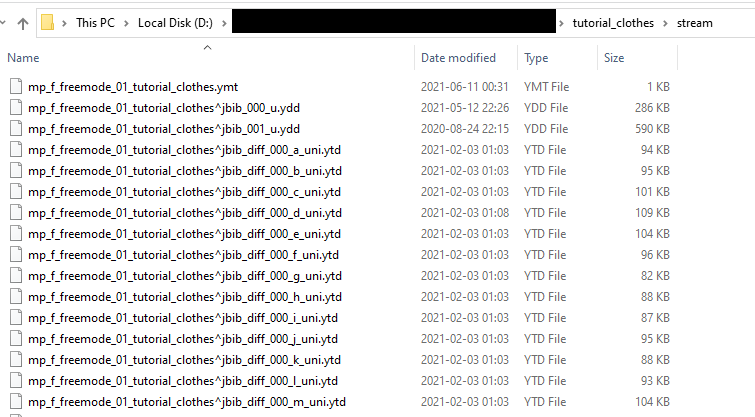
The next step is adding our own prefix, it will be the full YMT name from YMTEditor, in my case it will be mp_f_freemode_01_tutorial_clothes, and that is how our files should look like:
Step 3
Adding new entries in YMTEditor
Let’s go back to our YMTEditor and enable the components that we are using.
(In our folder there are models named jbib and lowr only, so enable it)
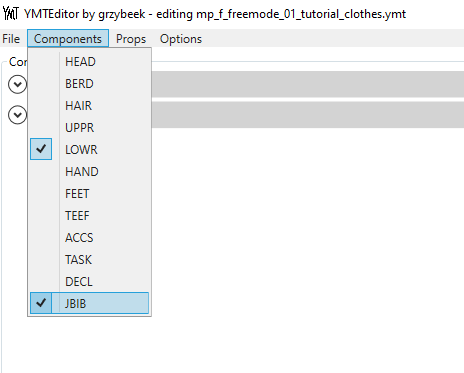
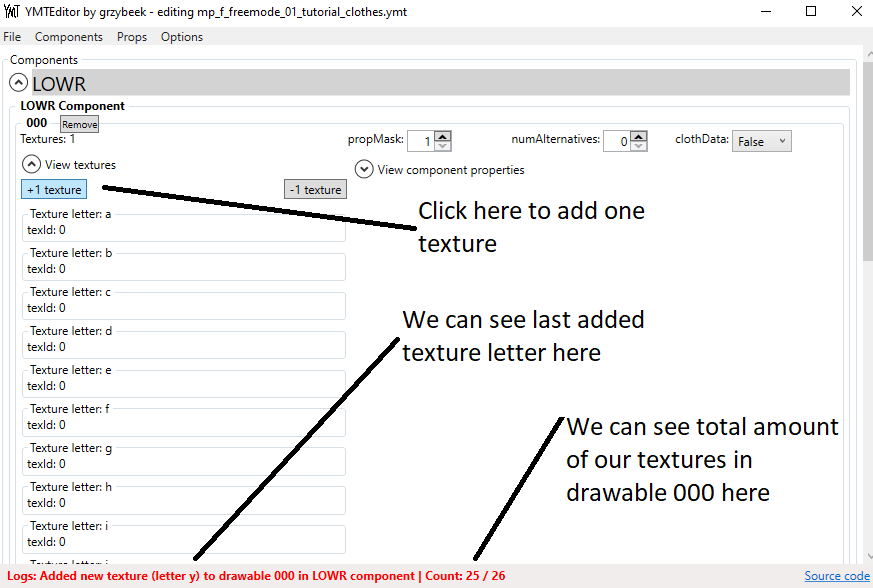
Now expand LOWR, you can see that we have already drawable number 000 added in the editor, but it says “Textures: 1”, expand the “view textures” button, and let’s add 24 more (there is 25 in total, the last letter is y)
But there is another thing, we have to do for our pants to work properly, at the beginning of tutorial i’ve mentioned that drawables can be either with suffix _u or _r, and our lowr(pants) are ending with _r and textures with _whi
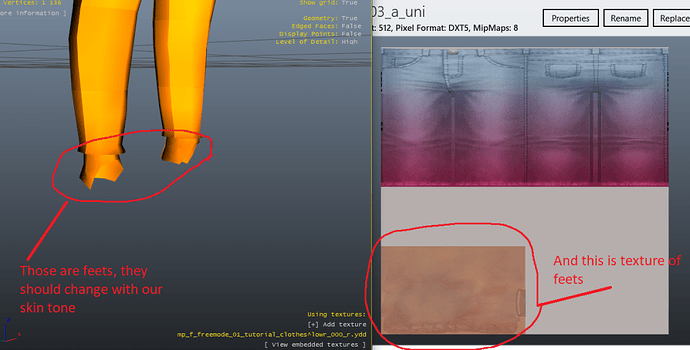
To check if the person that did this mod, did this properly, we have to use OpenIV, simply just drag .ydd and one texture to the “mods” folder in OpenIV (if you don’t have it, just create it) and double click them.
If our model contains this part of model (it can be bigger, if pants were shorter), and our texture contains piece of skin texture in left-bottom corner, so we can use suffix _r and _whi in our .ymt
(Note that im showing only lowr, each different component that uses skin, could have it in different position, lowr = always left bottom corner. For other components, check original r* component and check where is their skin texture located on texture!)
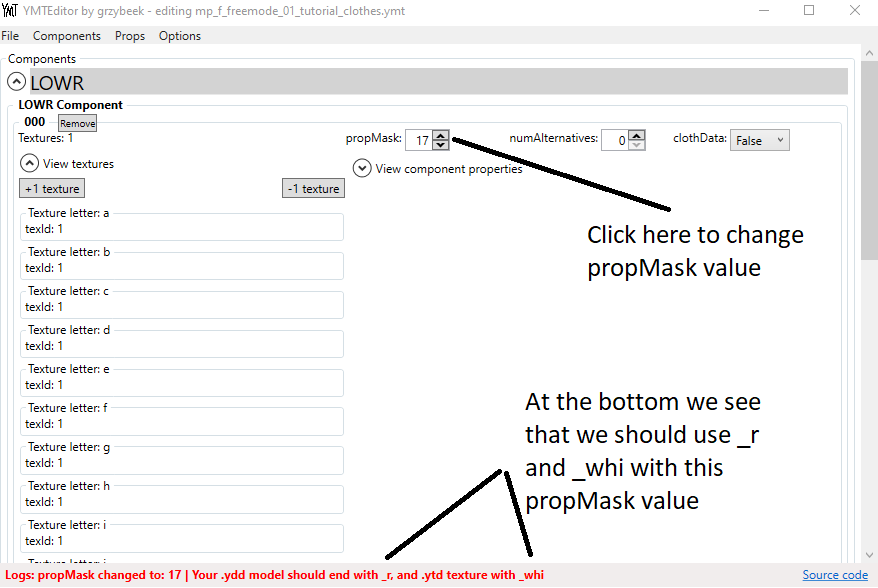
Simply, to enable that so “game knows” we are adding model that contains skin data, change propMask value in YMTEditor to 17/19/21 (usage of different numbers is unknown, i’m gonna use 17)
Now collapse LOWR and expand JBIB
Since we are going to add two jbib drawables, we need to click button “Add new drawable”
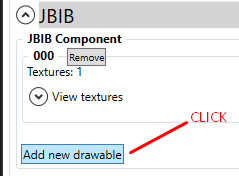
Now add textures to each drawable, 000 has 14 textures (a-n)
And 001 model has 12 textures (a-l)
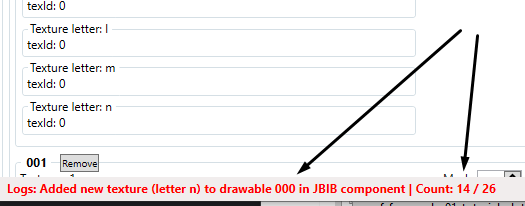
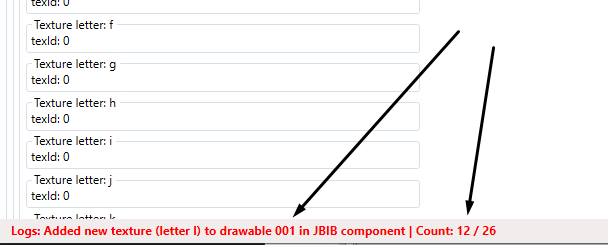
Step 4
Saving and preparing other files
To save, just click File > Save (YMT) and keep name of our file(don’t change it!, it is important to keep all same names)

Now navigate to your resources folder on your server, and create a folder with the name of your choice, i’m gonna name it “tutorial_clothes” to keep names the same.
In folder “tutorial_clothes” create another folder called “stream”
Now open text editor of your choice (i’m using notepad++)
And put that inside, and edit it with your YMT names!
<?xml version="1.0" encoding="UTF-8"?>
<ShopPedApparel>
<pedName>mp_f_freemode_01</pedName>
<dlcName>tutorial_clothes</dlcName>
<fullDlcName>mp_f_freemode_01_tutorial_clothes</fullDlcName>
<eCharacter>SCR_CHAR_MULTIPLAYER_F</eCharacter>
<creatureMetaData>MP_CreatureMetadata_tutorial_clothes</creatureMetaData>

<pedOutfits>
</pedOutfits>
<pedComponents>
</pedComponents>
<pedProps>
</pedProps>

</ShopPedApparel>
pedName = name of ped our ymt is for, we did for female so it is “mp_f_freemode_01”
dlcName = name of our ymt, we named it “tutorial_clothes”
fullDlcName = pedName + dlcName, so it will be our YMT name as well “mp_f_freemode_01_tutorial_clothes”
eCharacter = i don’t know usage of it, we are using female ped so put “SCR_CHAR_MULTIPLAYER_F”, male uses: “SCR_CHAR_MULTIPLAYER”
creatureMetaData = i’ve named it with the name of our chosen name (we are not using this file anyway, it can be left empty. This file “tells the game” that we are using “expressionMods” field in our .ymt - it is used to do heels shoes, or hide hair with hats - it is complicated, maybe i will explain it in other tutorial Explained here: [How-To] Create addon heels OR hide hair with addon hat)
Save it as “mp_f_freemode_01_tutorial_clothes.meta” (it can be any name, i kept it the same like names before)
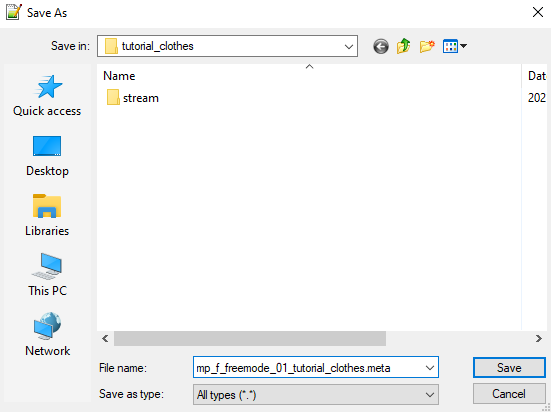
And create another file with this inside, of course edit it with your names!
fx_version 'cerulean'
game 'gta5'

files {
    'mp_f_freemode_01_tutorial_clothes.meta'
}

data_file 'SHOP_PED_APPAREL_META_FILE' 'mp_f_freemode_01_tutorial_clothes.meta'
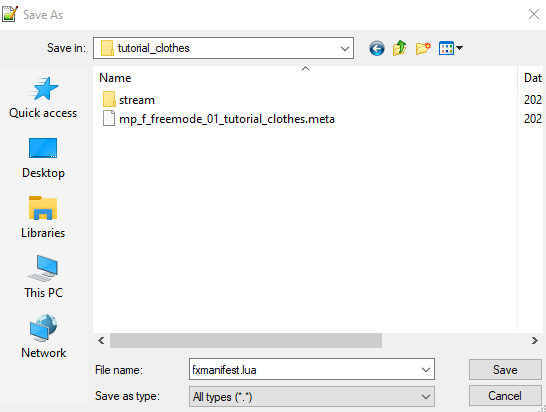
In “files” section, we have to type the name of our .meta file we just did before, I have to put: “mp_f_freemode_01_tutorial_clothes.meta”
Under files section, we have to specify data_file that our .meta file is using, in our case it is “data_file ‘SHOP_PED_APPAREL_META_FILE’ ‘mp_f_freemode_01_tutorial_clothes.meta’
And save that file as “fxmanifest.lua”
Step 5
Copy our YMT, model and textures
And the last step before going into the game, we have to put our .ymt file we saved before, and our .ydd/.ytd files we prepared before into the “stream” folder.
Simply just put everything into it, if you want to, you can segregate them by your choice, you can create infinite amount of folders inside “stream” folder
Next step is to add starting line to our server.cfg (or any other place you are starting all your resources)
Add this line, it can be either start or ensure: “start tutorial_clothes” (If you used different name for your resource folder, change it!)
Step 6
Testing in game
Simply just go in game, and change your skin/components (with any script, in the section where you have pants and tops) to the last number, since we did addon, it will be at the end.
You can manipulate order of your addons by adding “dependency [scriptname]" in fxmanifest.lua,
for example: “dependency clothes_1”, so resource called “clothes_1” will be started before our resource “tutorial_clothes”
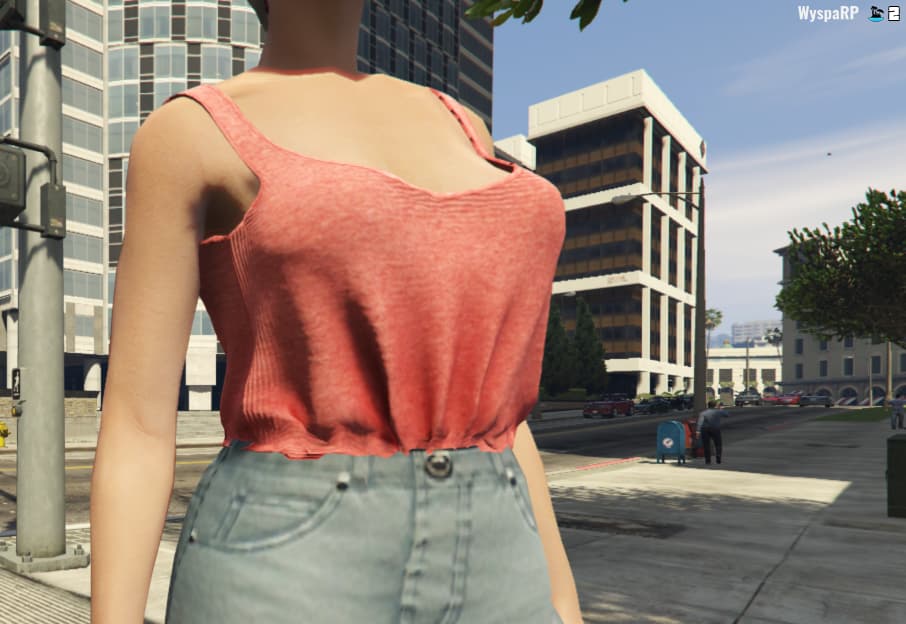
And…. our clothes work!
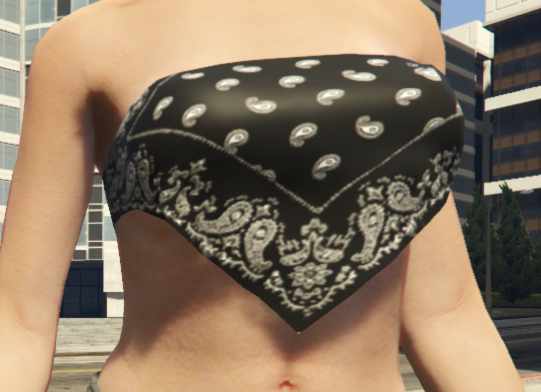
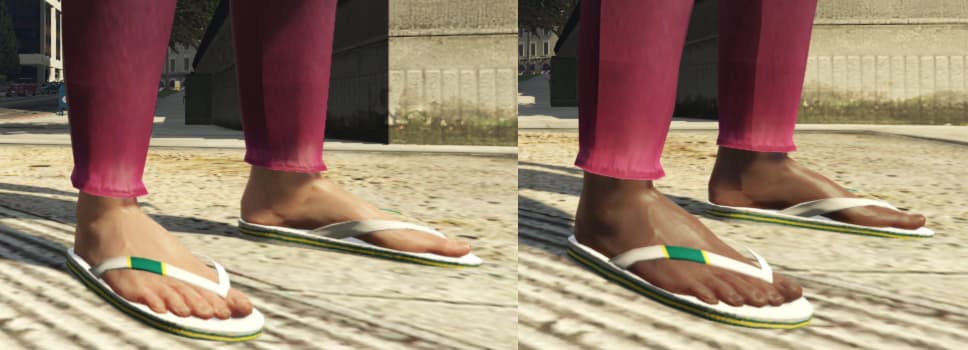
And skin tone color does change in our pants!
A few words at the end
I hope I wrote this tutorial quite understandably, if you have any questions, feel free to ask!
Also, I didn’t say how to add props, it’s simply same way as everything else, but the name will be for example for p_head:
- ydd: “mp_f_freemode_01_p_tutorial_clothes^p_head_000”
- ytd: “mp_f_freemode_01_p_tutorial_clothes^p_head_diff_000_a”
Second tutorial about making high heels for females, and hiding hair with addon hat
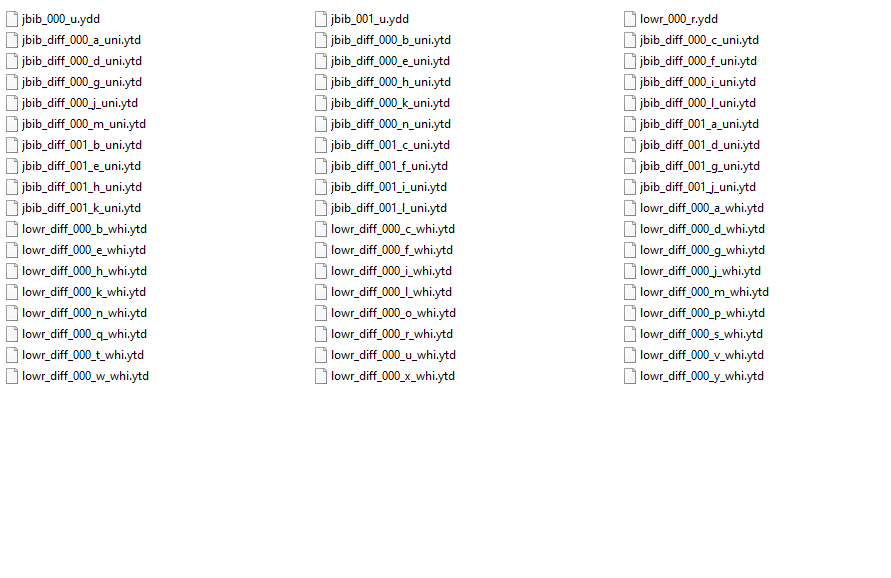


 Shortly after I asked the questions I realized I made a punctuation error when renaming files. Thanks again for the tutorial!