I wanted to create a simple tutorial that everyone can understand about how to add different types of custom vehicles to their server. This article is mainly for people that want to get into FiveM development but have never worked with it before. There will be 2 parts to this tutorial. Like I said, this is very simple and anyone can do it!
I would recommend using my template so you don’t have to make all of the files yourself. Here is a link : [Release][Paid] Add-on/Replace Vehicle Template - FiveM Resource Development & Modding / Releases - Cfx.re Community
Part I. Replace Vehicles
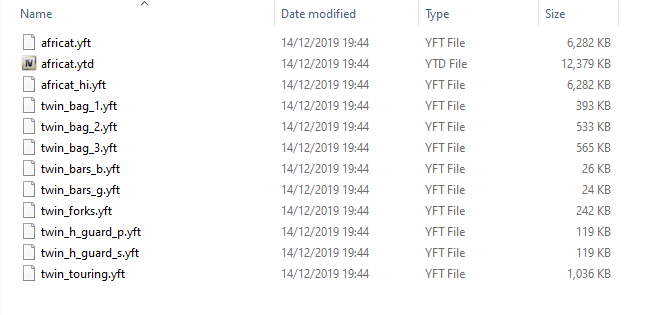
Possibly the easiest type of vehicle to put into your server, replace vehicles only require the vehicle files themselves (as in the .yft and .ytd files included in the download). See below if the replace download comes with any .meta files.
Step one - create a folder for the name of your vehicle. This can be anything you want, but I’d recommend keeping it simple as we will need it later on.
Step two - Inside that folder, make another folder labeled ‘stream’. Drag and drop the YFT and YTD files into the ‘stream’ folder. This will tell FiveM to stream the vehicles to your server once we put the resource in your server files.
Step three - Back out until you are in the original folder (the one that ‘stream’ is housed in). Right click > new text document. Inside of that document, paste the following text:
resource_manifest_version '77731fab-63ca-442c-a67b-abc70f28dfa5'

files {

}

data_file '' ''

client_scripts 'vehicle_names.lua'
File>save as>__resource.lua (Two underscores!)
From there, drag and drop your new resource into your server resources, and add ‘start (foldername)’ to your server.cfg
Badda-bing, Badda-boom. You’ve created a replace resource!
Part II. Add-on Vehicles
Add-on vehicles are assets which require the vehicle files themselves (as in the .yft and .ytd files included in the download) and 1-4 .meta files. These are a little bit more complicated and can take some time.
Step one - create a folder for the name of your vehicle. This can be anything you want, but I’d recommend keeping it simple as we will need it later on.
Step two - Inside that folder, make another folder labeled ‘stream’. If the download comes with an RPF file (rage package file), you will need OpenIV to be able to work with it. You should be able to google a tutorial on that if you need too. If not, repeat step two from the replace tutorial. Drag and drop YFT and YTD files into the ‘stream’ folder.
Step three - Back out until you are in your base folder. Right click > new text document. Inside of that document, paste the following text:
resource_manifest_version '77731fab-63ca-442c-a67b-abc70f28dfa5'

files {
    'vehicles.meta',
    'carvariations.meta',
    'carcols.meta',
    'handling.meta',
}

data_file 'HANDLING_FILE' 'handling.meta'
data_file 'VEHICLE_METADATA_FILE' 'vehicles.meta'
data_file 'CARCOLS_FILE' 'carcols.meta'
data_file 'VEHICLE_VARIATION_FILE' 'carvariations.meta'
File>save as>__resource.lua (Two underscores!)
Go back to your download/rpf and drag all of the .meta files that were included in the download into your base folder. If it didn’t include a carvariations.meta file, remove ‘carvariations.meta’ and data_file ‘VEHICLE_VARIATION_FILE’ ‘carvariations.meta’ from your __resouce.lua. Do this for every .meta file it doesn’t include.
From there, drag and drop your new resource into your server resources, and add ‘start (foldername)’ to your server.cfg.
You’ve created an add-on resource!


 I might share the car packs in the future if anyone is interested.
