RAGE ERROR: ERR_GFX_STATE
This error can be the most maddening to resolve since it’s caused by many different reasons. You may not need to try them all. Simply work your way down the list in order, from easiest to more complex, until you find the one that works!
Persevere knowing there IS a reason for the crash and be patient with the process since there are no shortcuts in troubleshooting. Good luck!

There are different things that cause this same error message:
- If using HDMI and/or mixed cabling (HDMI + Display Port).
- If your GPU/PC is overheating.
- If your GPU is overclocked.
- If your RAM is overclocked.
- If GPU drivers are out of date or corrupted.
- If game files are corrupted.
- If the GPU is physically damaged.
- If your BIOS is out of date.
TABLE OF CONTENTS
1: Run Windows Updates
2: Confirm your C-drive is not full
3: Disable GPU or RAM Overclocking
4: Update your GPU Drivers
5: Use only Display Port
6: Change the Default Graphics API to Direct X 12 from Vulkan
7: Delete SGA files
8: Verify game files
9: Disable Fullscreen Optimization
10: Use DDU to perform clean install of GPU driver
11: Add specify launch arguments
12: Check the GPU physically
13: Update your BIOS
METHODOLOGY:
1: Run Windows Updates
Most likely checking for Windows updates will not resolve the error, but this is baseline to rule out any issues with Windows OS.
2: Confirm your C-drive is not full
Most likely checking free space on your C-drive will not resolve the error, but this is baseline to rule out any issues with a full C-drive.
3: Disable GPU or RAM Overclocking
If you’re using MSI Afterburner or other GPU tweaking programs, you’re more likely to get this error message. The game engine doesn’t really support cards that are overclocked. And overclocking can cause game instability and thus the game might crash. So to fix it, you should disable any overclocking settings for your CPU and/or GPU.
4: Update your GPU Drivers
Keeping your GPU drivers is paramount for good performance!
After updating your drivers, restart your computer for them to take effect. Then launch your game to check if it worked.
5: Change the Default Graphics API to Direct X 12 from Vulkan.
- For AMD graphics cards, Vulkan is generally the better choice.
- For NVIDIA, DX12 is generally the better choice.
As in all things tech, YMMV!
Change API via RDR2 or API settings file. Instructions here.
NOTE: You may need to flip from one to the other to effect change.
FIX 6: Delete SGA files
Files with the extension SGA are created for the game. They are compressed files often containing maps or large groups of related files. But there are situations that these files cause crashing or other errors in your game. So to fix it, you should delete them. To do so, simply follow the instructions below:
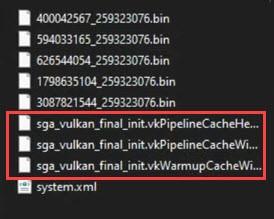
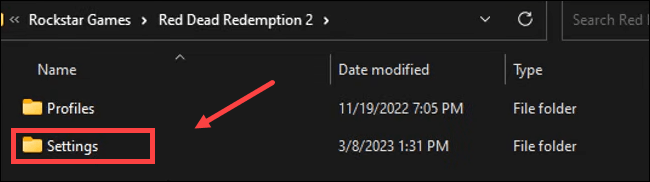
Go to C:\Users(your user name)\Documents\Rockstar Games\Red Dead Redemption 2\Settings.

Now you can see three files that begin with sga. These are the files that cause the error. So you need to delete them. And your game would not crash again.
If deleting these files didn’t work for you, you can alternatively create three empty text files of size 0B and make those files read-only. Also, change the names to sga_xxx accordingly. This might be very specific to your setup and the true root cause you’re having.
7: Verify game files
Corrupted or missing files could also cause ERR_GFX_STATE. How to Verify your game files.
When the verification is done, restart your PC, then run RedM again to see if the ERR_GFX_STATE error remains.
8: Disable Fullscreen Optimization
Disable Fullscreen Optimization instructions here.
9: Use DDU to perform clean install of GPU driver
If simply updating your GPU driver didn’t help, your faulty or outdated graphics driver may be the culprit and generate the ERR_GFX_STATE error.
To fix it, you can try to do a clean update of the graphics card driver. To do so, DDU (Display Driver Uninstaller) is usually recommended, as it can do a pretty good job removing all the older or faulty display driver files on your computer.
- You can’t perform a clean uninstall of drivers without DDU.
- If you swap rtx 3000 series to rtx 4000 series without DDU it will perform the same as your 3000 series GPU
How to use Display Driver Uninstaller (DDU) Guide / Tutorial
To do a clean reinstallation of the display card driver with DDU:
- Download and search for the execution file of the display card driver from the website of your GPU manufacturer:
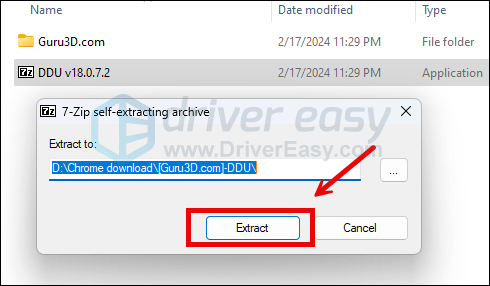
- Download DDU from the official download page. Then unzip the folder, and double-click the DDU file to further extract the execution file.
- Boot your computer into Safe Mode as instructed here: Start Safe Mode using the System Configuration tool
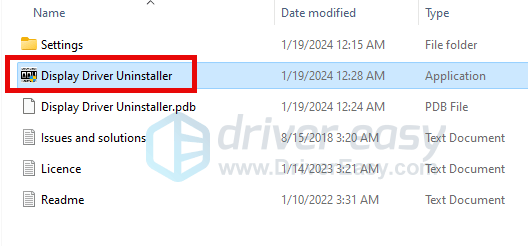
- When in Safe Mode, go to the folder where you unzip the DDU execution file. Double-click to run Display Driver Uninstaller.
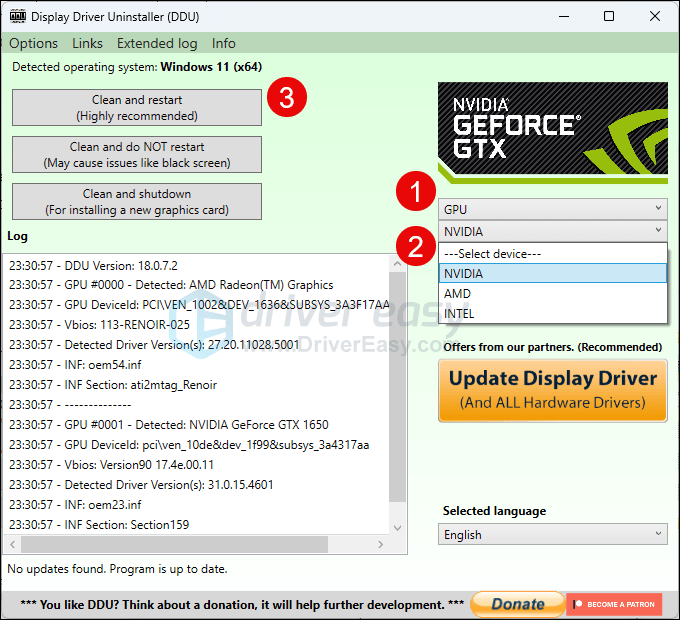
- Select GPU and your GPU manufacturer on the right side. Then click Clean and restart.
- Your computer should restart when the old driver files for your graphics card are cleaned.
- Double-click the setup file for the display card driver you’ve downloaded from step 1 to run the driver installation.
- Restart your PC.
10: Add specify launch arguments
This typically is not required, but is listed here as a solution that has worked for others.
Command line arguments are extra commands you can use when launching your game so that the game’s functionality will change.
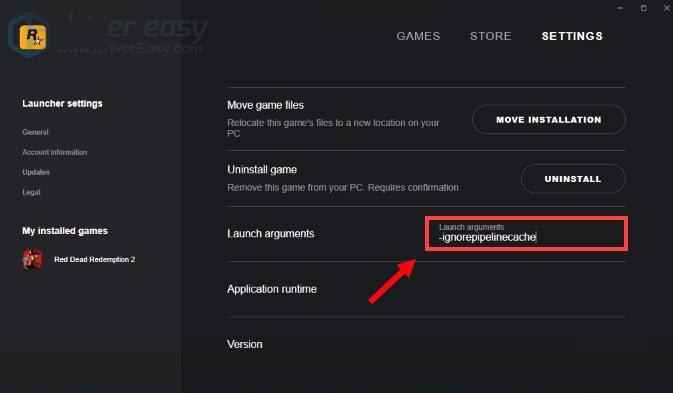
Rockstar Games Launcher
- Open your Rockstar Games Launcher and select Settings.
- Under My installed Games, select Red Dead Redemption 2.
- Scroll down to Launch arguments. In the text box, add -ignorpipelinecache.
- Restart your PC.
- Launch RedM to see if the error persists.
Epic Games Launcher
- Open your Epic Games Launcher. On the bottom-left side, click on Settings.
- Scroll down to Red Dead Redemption 2. Tick the box Additional Command Line Arguments.
- In the text box, add -ignorepipelinecache.
- Return to the Main Menu.
- Restart your PC.
- Launch RedM to see if the error persists.
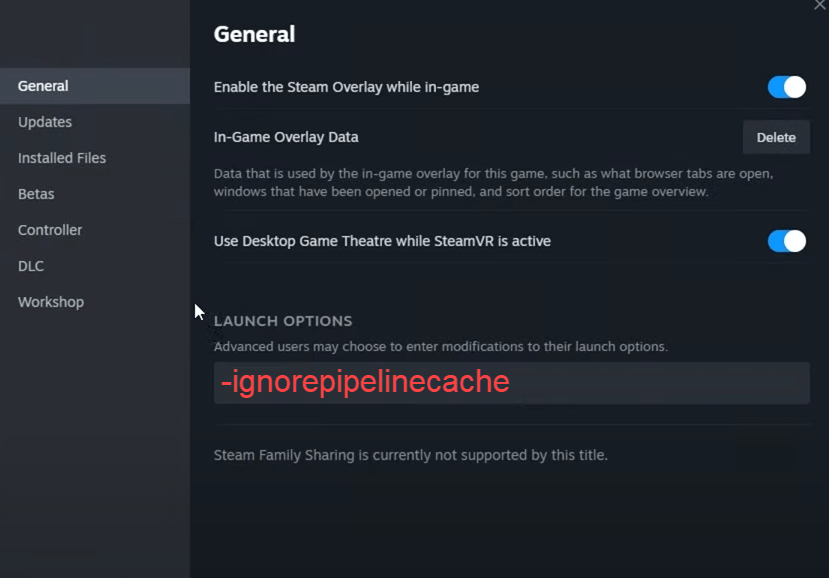
Steam Launcher
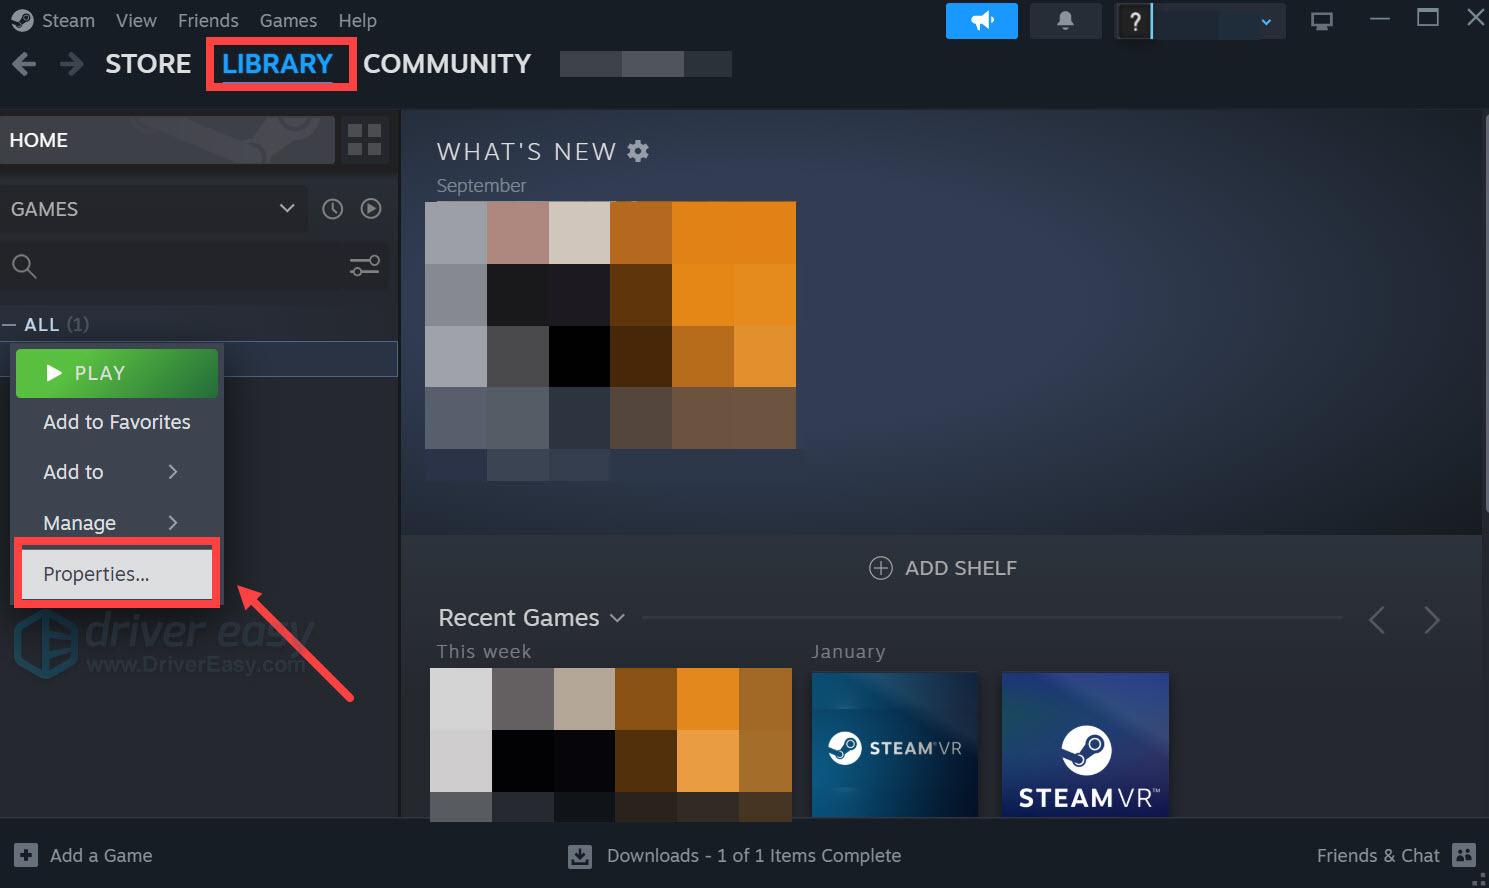
- Open your Steam client. Under LIBRARY, right-click on Red Dead Redemption 2 and select Properties.
Under the launch options, add -ignorepipelinecache.
- Then save.
- Restart your PC.
- Launch RedM to see if the error persists.
11: Check the GPU physically
It’s possible that the GPU may be loose, and or damaged. If you do not feel comfortable opening the PC case to perform this work, take your PC to a reputable repair shop.
12: Update your BIOS
Outdated BIOS can also trigger this error. Although updating your BIOS is easy, due to multiple types of computers, updating BIOS is listed last due to the potential to mess up your PC if you don’t know what you’re doing.
VERY IMPORTANT:
- Do not power off your PC during the BIOS update as it might “brick” your PC.
- It is best practice to back up your data before updating the BIOS.
As above, if you don’t feel comfortable updating your BIOS take your PC to a reputable repair shop.
If you have tech ability and/or courageous enough to follow directions as prescribed for updating your computer’s BIOS, proceed.
- Use Google search for “how to update BIOS on PC model .
- Many manufacturers, such as Dell, have site built so you can search for BIOS updates via your PC’s serial number.
- The Serial Number of any PC can be obtained by running CDM command: wmic bios get serialnumber

How To Verify Your Game Files
Via Steam
- Open Steam.
- Go to your Library
- Right click on Red Dead Online (or RDR2)
- Click properties
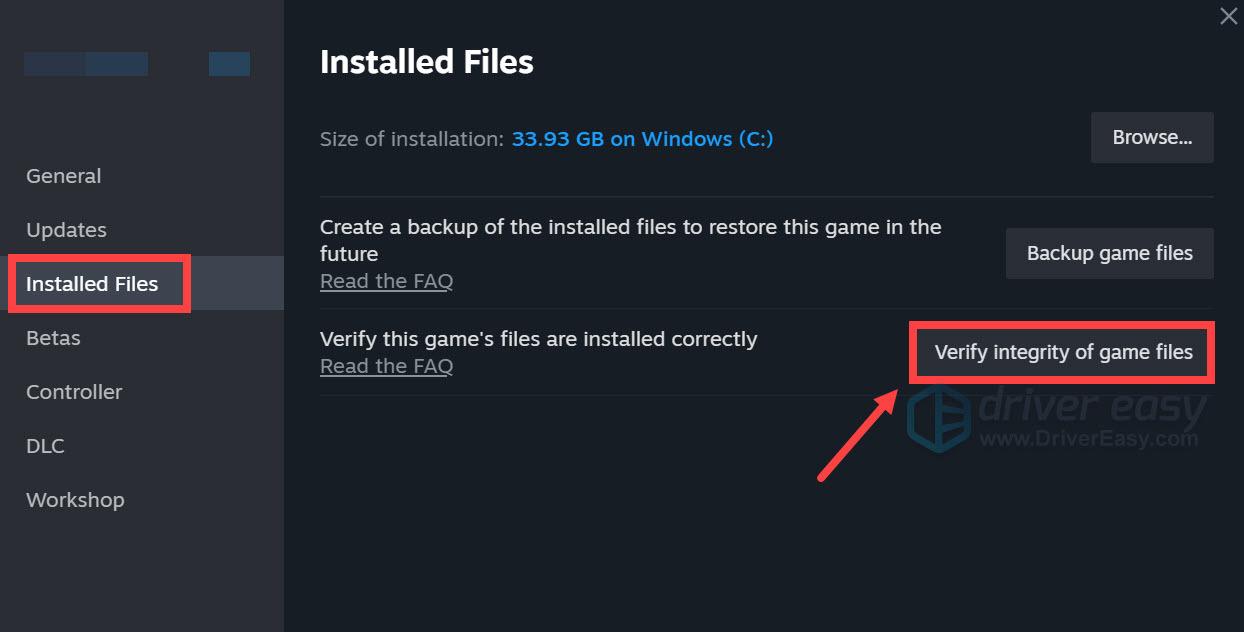
- Select “Installed files” > “verify integrity of game files”:
- This will check your game for any corrupted or missing files. This can take a bit of time, but if there are any found they will be replaced automatically.
- When the verification is done, restart your PC.
- Try reopening Redm again.


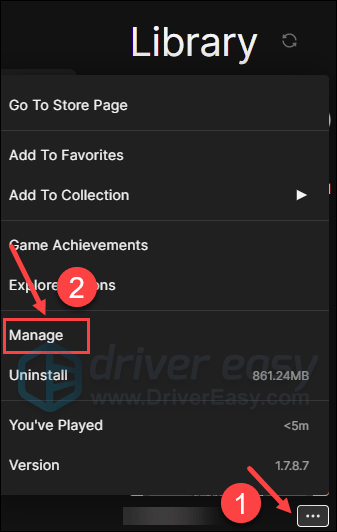
Verify game file via Epic Games Launcher
- On Epic Game Launcher, find Red Dead Redemption 2 in your Library.
- Click the three dots on the right side of the game line and select Manage.
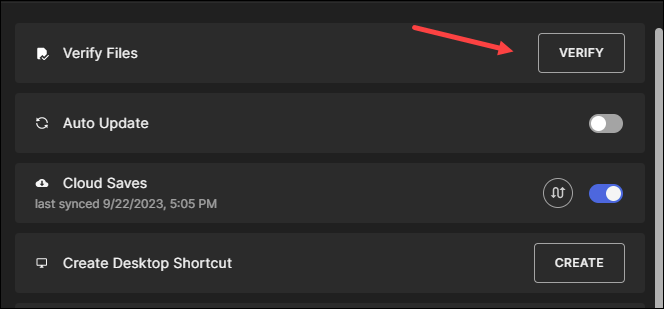
- Click Verify to start verifying the game files.
- Wait for verification to complete. (It may take a while to verify all your files.)
- When the verification is done, restart your PC.
- Try reopening Redm again.
Verify game file via Steam
- Launch Steam.
- In the LIBRARY, right-click on Red Dead Redemption 2 and select Properties from the drop-down menu.
- Select the Installed Files tab and click on the Verified integrity of game files button.
- Steam will verify the game’s files – this process may take several minutes.
- When the verification is done, restart your PC.
- Try reopening Redm again.
Verify game file via Rockstar Games Launcher
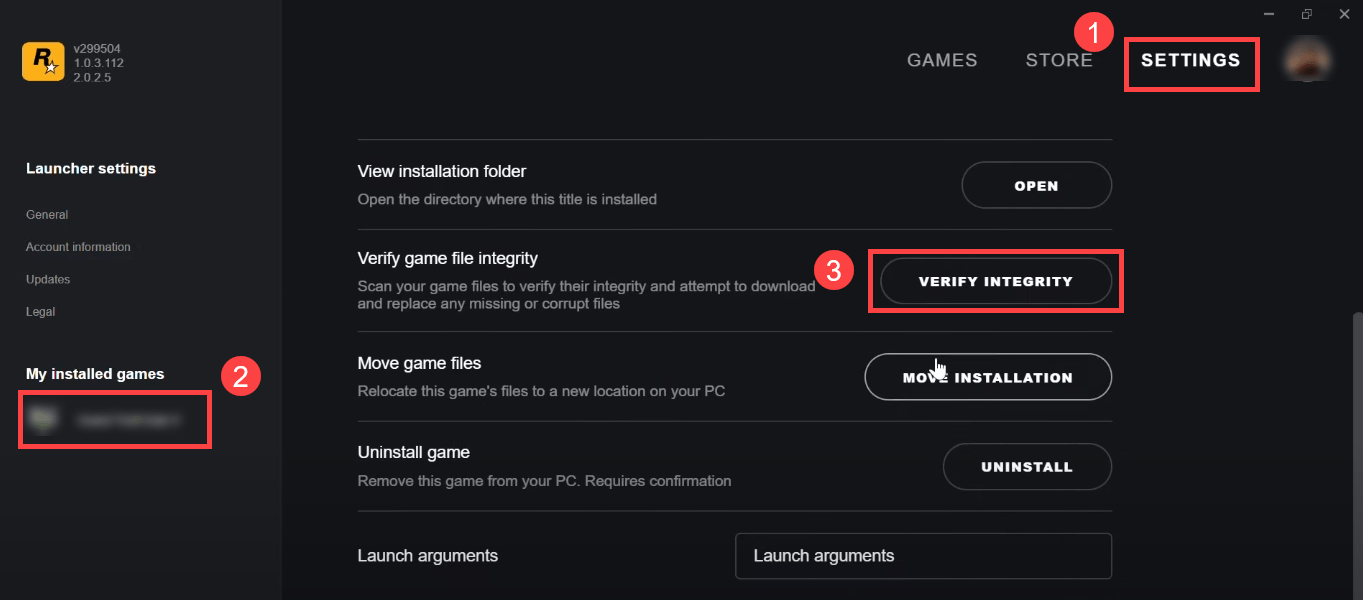
- Open Rockstar Games Launcher.
- Click SETTINGS, then find Red Dead Redemption 2 in the My installed game list.
- click the VERIFY INTEGRITY button next to the Verify game file integrity option.
- Wait for the process to finish.
- When the verification is done, restart your PC.
How to Download Your GPU Drivers
- NVIDIA: Download The Latest Official NVIDIA Drivers
- AMD: Drivers and Support for Processors and Graphics
- INTEL: https://downloadcenter.intel.com/product/80939/Graphics
How to Disable Fullscreen Optimization
Via Rockstar Games Launcher.
- Open the Rockstar Games Launcher
- Click Settings
- Click Red Dead Redemption 2 under My Installed Games
- Click Open under View installation folder
- Right-click on RDR2.exe
- Click Properties
- On the Compatibility tab, check Run this program as administrator and disable full screen optimization
- Click OK
- Return to the My Installed Games menu in the Rockstar Games Launcher
- Launch Red Dead Redemption 2
Via Steam Launcher
- Open the Steam Launcher
- Click Library
- Right-click Red Dead Redemption 2 and select Properties
- Click on Local Files
- Click on Browse…
- Right-click on RDR2.exe
- Select Properties
- On the Compatibility tab, check Run this program as administrator and disable full screen optimization
- Click OK
- Return to your Library in the Steam Launcher
- Launch Red Dead Redemption 2
Via Epic Games Launcher
- Open the Epic Games Launcher
- Click Library
- Click the three dots next to the Red Dead Redemption 2 tile
- Click Manage
- On the Installation tab, click the folder icon
- Right-click on RDR2.exe
- Select Properties
- On the Compatibility tab, check Run this program as administrator and disable full screen optimization
- Click OK
- Return to your Library in the Epic Games Launcher
- Launch Red Dead Redemption 2
How to Change the Default Graphics API
Via RDR2 Game:
- Launch Red Dead Redemption 2.
- From the Main Menu, select Settings.
- Select Graphics.
- Under Advanced Settings, select Unlocked.
- Under Graphics API, select DirectX 12.
- Save your settings, but do not restart the game when prompted.
- Return to the Main Menu.
- Exit the game.
- Launch Red Dead Redemption 2.
- Disable Fullscreen Optimization.
- Restart your PC.
Via API Settings File:
If you can’t launch RDR2, use this solution to change API settings file:
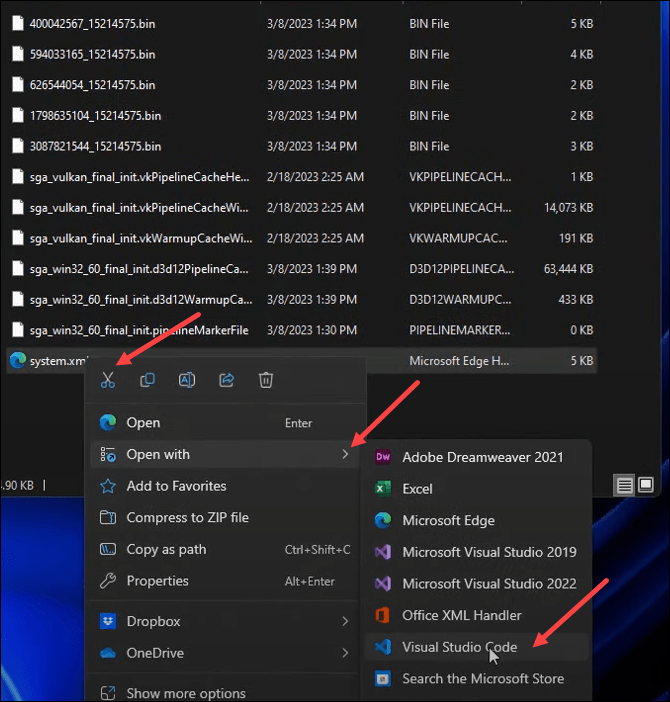
- Go to C:\Users(your user name)\Documents\Rockstar Games\Red Dead Redemption 2\Settings.
- Right-click the system.xml file and open it with an editor. Here, we use Visual Studio Code, but you can go with Notepad, Notepad++ or any other similar editor.
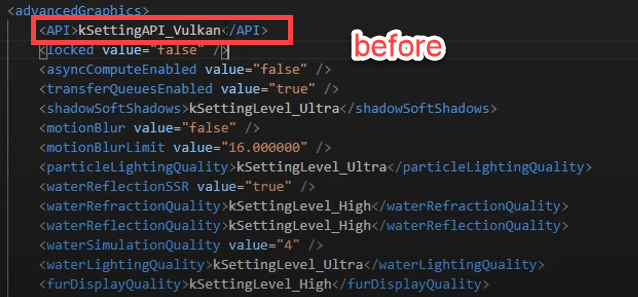
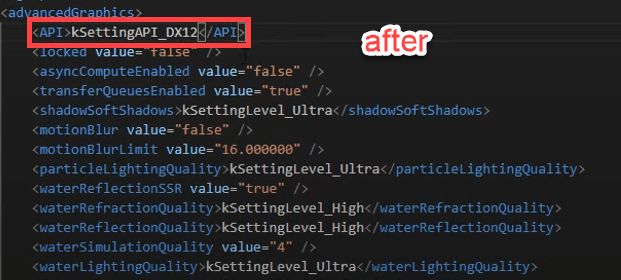
- Change the API Settings from Vulkan to DX12.
- Save the change.
- Restart your PC.
RedM Humor, Disclaimer & Final Thoughts
Whether players or developers, we all have felt the pain point of RedM not working as we would like.
A reminder from CFX in November 2021 keeps in perspective:
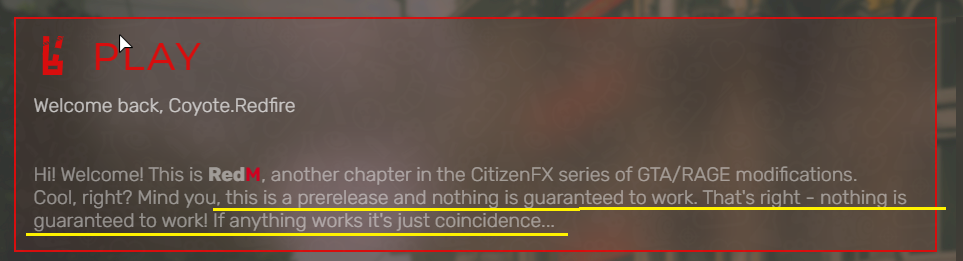
That RedM works as well as it does is a testament to the hard work of each RedM developer, the collaboration among the dev community and the immense work from CFX for providing the platform on which we all can enjoy the majestic world the Rockstar has created.
Each developer should feel proud and privileged to bring RedM content to players to enjoy!