Step 0: Install Visual Studio and Download Resource Hacker.
Step 0.3: After installing Visual Studio, run the Visual Studio installer.(I’m aware of how redundant that sounds lets continue)

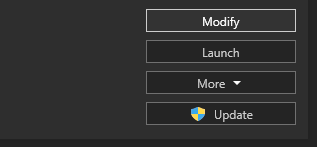
Step 0.6: Once loaded click on “Modify” and scroll down to the “Gaming” section and select “Game development with C++” then click on “Modify” or “Install while downloading” depending on what your situation is to ensure you get same screen I have in the videos posted
Step 1: Make a dummy.txt file.
Step 2: Make a fx_asi_build.rc file.
Step 3: Copy the following into said rc file with notepad or whatever.
FX_ASI_BUILD 2802 dummy.txt
FX_ASI_BUILD 2189 dummy.txt
FX_ASI_BUILD 2372 dummy.txt
FX_ASI_BUILD 2545 dummy.txt
FX_ASI_BUILD 2612 dummy.txt
FX_ASI_BUILD 2628 dummy.txt
FX_ASI_BUILD 2699 dummy.txt
FX_ASI_BUILD 2944 dummy.txt
FX_ASI_BUILD 3095 dummy.txt
FX_ASI_BUILD 3258 dummy.txt
FX_ASI_BUILD 3407 dummy.txt
FX_ASI_BUILD 3442 dummy.txt
FX_ASI_BUILD 3504 dummy.txt
FX_ASI_BUILD 3521 dummy.txt
FX_ASI_BUILD 3570 dummy.txt
FX_ASI_BUILD 3586 dummy.txt
FX_ASI_BUILD 3717 dummy.txt
Step 4:Open the rc file with Visual Studio and save as res.
Step 5:Watch Part two or keep reading.
Step 6:Run Resource Hacker, then go to File>Open, select all files and choose your .ASI file
Step 7:Navigate over to Action>Add from Resource File and select your newly created .res file
Step 8:Click on check all and import
Step 9:Save and Enjoy.
Note: if check all and import doesn’t work try selecting only the one you need.
Big shout out to @anon70864786 for the idea and @kibukj for the original write up.
Here’s a FX_ASI_BUILD rc and res
fx_asi_build.res (928 Bytes)
fx_asi_build.rc (462 Bytes)
just in case
Alternatively if you don’t want to go through all that you can use [Tool] ASI Version Injector by @Akkariin

