 Essential Purpose
- Since you’re here I am assuming that you are needing help with importing an .sql file into your server’s database! Good for you, you are in the right area to see how to actually do it. Now there are a lot of other posts out there that I’ve seen regarding this, however, I haven’t seen much information, regarding it or even any general explanation on how to do it.
 Resources
- Before we can even import anything to your database, you’re going to need a select few things to do this, of course some are not required if you’re using a different type of a service or just don’t want to go through the extra trouble.
- HeidiSQL (Optional for localhosting servers) Link
- XAMPP (Required for localhosting servers) Link
- A FiveM Server
 PHPMyAdmin Database
phpmyadmin Information
Local Hosting Server
- Now before you get confused, yes you can just use phpmyadmin for your localhosting server instead of needing HeidiSQL as it’s not really required to run.
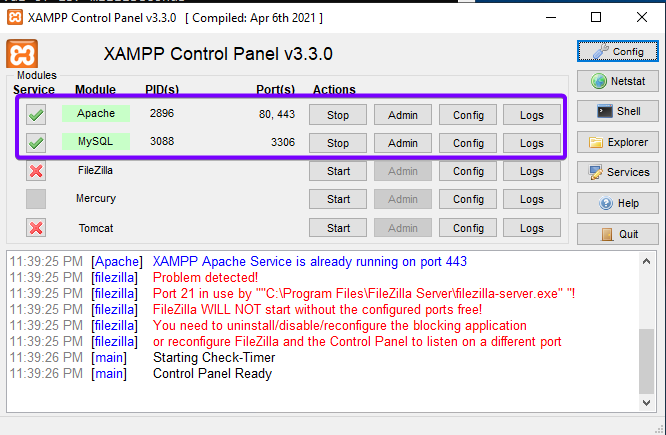
- Open up your XAMPP control panel application and click the ADMIN button for MySQL.
XAMPP Control Panel Info
- If you are needing info on how to basically set your XAMPP up to work with your server, you need to make sure you install the basic services for your server control panel!
- Apache
- MySQL
- How you would install it, is to click the little box on the left side of the application, (Should default with an X) and then it will install the service, changing the X to a Check mark.
- After doing so, click the RUN button or START button whichever one is showing for you, next to the ADMIN button, and it will start the application.
- After clicking the ADMIN button, it should show you opening phpmyadmin and should automatically log you into your database.
- On the left side you should see a bunch of tables created from phpmyadmin. What you want to do, is click the NEW button at the top.
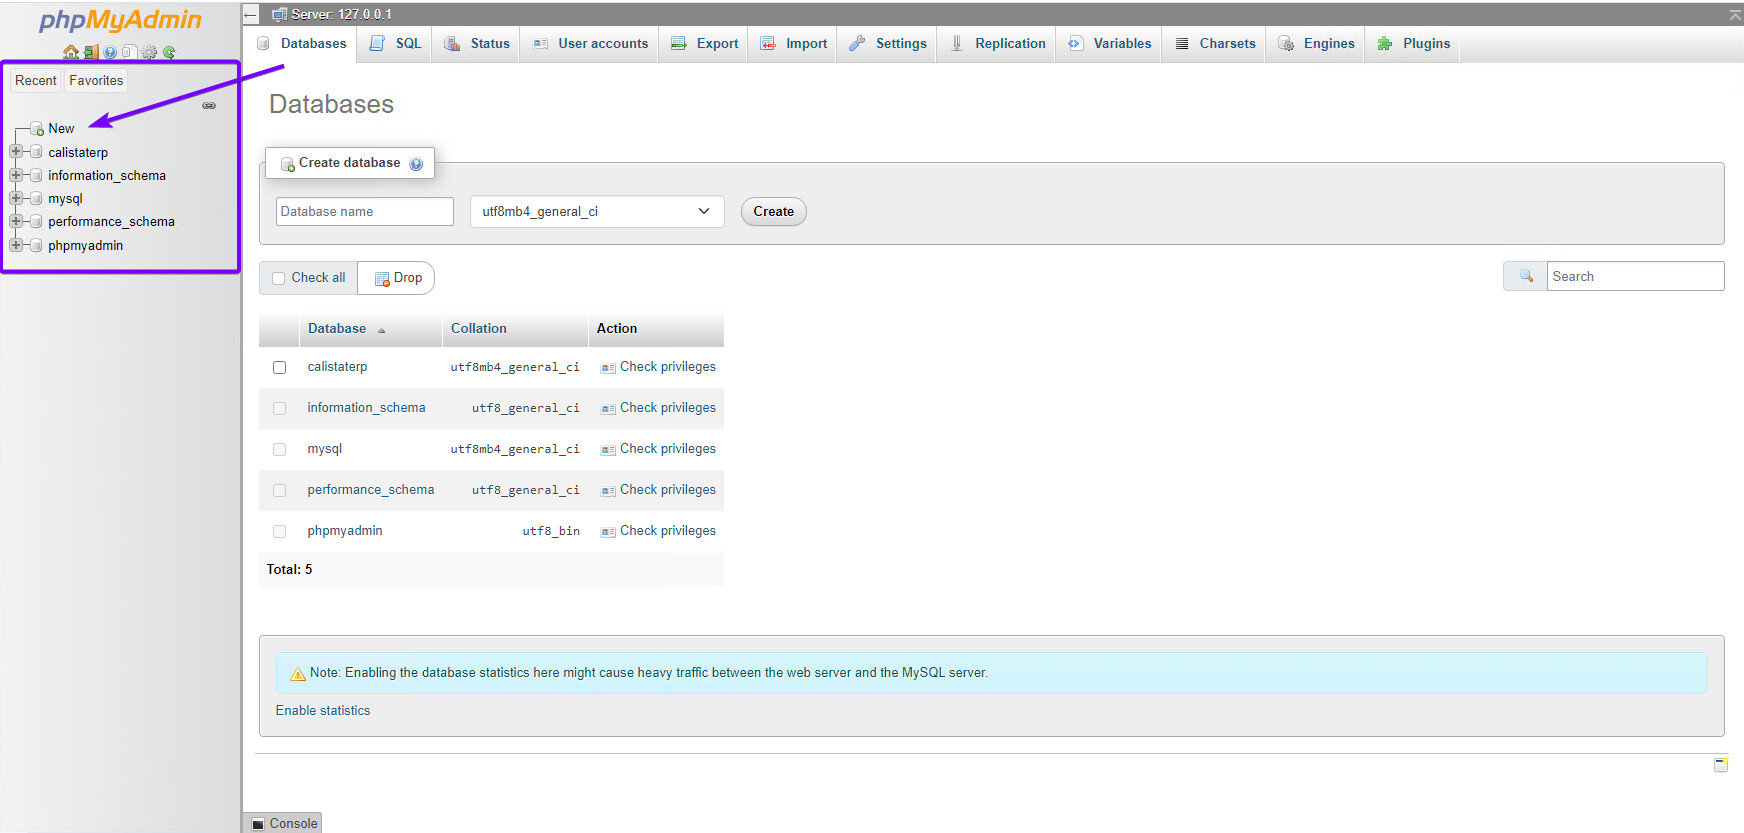
- You’re going to want to put a name in the box called “Database Name” (You don’t have to, but to prevent further issues, put the name as something short and in all lowercase. For example:
ssarpdata - After typing in a name for your database, you’re going to want to click CREATE and then it should show a new database, if you cannot see the database on the list to the left, click the REFRESH button, (shown in the image below) and it should show the new database you created.
phpmyadmin Refresh Button

- Once you see your database, you’re going to want to click it to select it as the active database you are going to import data into.
- Once you select the database, go to the top of the database browser, and you should see a button called IMPORT, you’re going to want to click that button and then it will ask you for a file to import.
- Click
Choose Fileand then navigate to the file that you are importing. Sometimes putting the sql file on your desktop will make it easier to find through the file explorer. - After you choose the file you are wanting to import, and it is selected, scroll down in phpmyadmin and there should be a button saying Import. Once you click that your file should be imported into the database. If not, it will show you an error and tell you why it wasn’t imported.
Web Hosting Services (Zap-Hosting, Rocket-Node, etc.)
- Now before you get confused, yes you can just use phpmyadmin for your localhosting server instead of needing HeidiSQL as it’s not really required to run.
-
Open your hosting’s panel and navigate to the DATABASE tab. There you should see a database made for your server. (If you don’t click the button to create a new database and give the database a name.
-
After you create a database, you should see an icon with basically 3 circles on top of each other, click that icon and it will open phpmyadmin.
-
Unlike localhosting phpmyadmin, web hosting will require your login and password for your database login. To grab this info, go back to your database panel and on the database itself, you should see 2 sections, one being “USERNAME” and the other being “PASSWORD”, those are the login credentials that you need to input into phpmyadmin in order to login to your database.
-
Once you login, you should already see your database + tables created on the left side of the screen. Just like localhosting, importing an sql file is the same way. Click your database name, and then click IMPORT at the top of your screen.
-
After doing so, it’s going to ask you for your file to import, navigate to where the file is (For webhosting, it would be easier to download the file onto your desktop and then import it that way.)
-
After selecting the file you want to import, scroll down in phpmyadmin and then click
Import, after that the file has been imported into your server’s database. If not, it will show you an error and tell you why it wasn’t imported.
 HeidiSQL Database
HeidiSQL Information
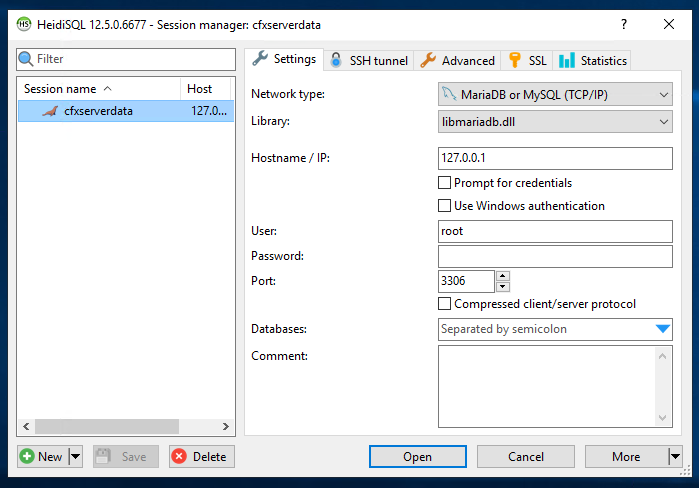
- After installing HeidiSQL from the link above, open the application and you should see a Session Manager screen, as shown in the image below.
HeidiSQL Starting Menu
Notice: The screen will look different from mine, but will still look similar.
-
You’re going to want to click the NEW button on the bottom left of the application screen and name it whatever you want to name it.
-
The Hostname / IP for your database information should be
127.0.0.1Changing this IP can cause issues. (Now you are able to change the hostname / IP to work with a web hosting service.) -
The username or in this case user as the application calls it, you want to make sure it states “root” as you are on localhosting.
-
The port for the connection info will be 3306 as these are the default ports for HeidiSQL.
-
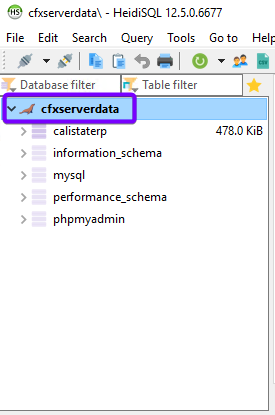
After all the information is set up, you’re gonna want to click “Open” on the bottom of the application screen and it should show a new window with all the database tables in that database.
Creating a new database
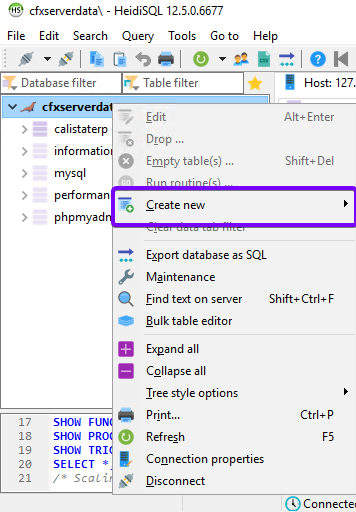
-
To create a new database with HeidiSQL, you’re going to right click the database name that you created in the start on the startup menu for HeidiSQL. It should be at the very top on the list.
-
After right clicking the main database name, you should see a list of options appear, you are going to hover over the
Create newoption, and clickDatabase.
-
Once you click that, it will ask you to input a name for your database. Just like before, keeping it short and lowercase will prevent any issues with your database name in the future. Name it something simple, for instance:
ssarpdataor whatever you seem fit for the name. -
After you choose an amazing name for your database, just click that
OKbutton and boom you now have a new database.
-
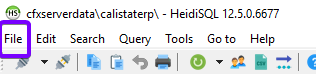
Click your database that you already had or just created following the steps above to create a new database, then click
Fileat the top of the application window.
-
When you click File it should open a dropdown list of options to choose from, you are going to want to click
Run SQL fileand it will open up File Explorer.
-
Navigate to wherever the .sql file is located in your files, whether that’s in the script’s folder, or on your desktop.
-
After finding the file, you are going to double click the file and it will start the importing process.
-
A few confirm popups will appear, you are just going to click YES for all the popups as it’s basically asking if you are sure you want to import that file.

 References
- Now that you have a database with a working sql importing for your scripts, in some cases your database may never connect to your server. With this being said, I have a topic on CFX.re regarding how to create a working database connection string. HOWEVER, this topic only covers LOCALHOSTING, if you are using a web host, you can contact me or comment below on this post and I can assist you with hooking your database up to your server.