-
If you’re reading this post then that must mean you need help creating your very own roleplay community on FiveM! Lucky for you, I have some ways of helping you with that (hopefully)!
-
Starting off, I just want to let everyone know that this is what I do when it comes to making a new fx server that’s standalone. You don’t have to do this step-by-step, but you can if you want to!
-
Before you get to far down, I just want to let you know that this method below only works for people that are hosting using either Home Hosted (Hosting the server of your own PC) or using a VPS host (I.e. SIlverHosting)
 How to create the server’s files needed:
- So… 1st, we need a server right? So lets start making our server shall we?
- 1st thing’s 1st. Let’s go ahead and go onto the desktop of your vps / home hosting pc. and create us a new folder and name it whatever you want, preferably something you will remember. (Example: FDRPMainServer)
- Head over to → Website and download the build version “6230” (The version could be outdated!)
- Open the zipped file downloaded (You need Winrar or 7-Zip)
- After copying all the files in the zipped file over to the folder you created, scroll down in the folder you dragged everything into and locate FXServer.exe.
- Run the .exe
- After it opens a link in your browser, click LINK ACCOUNT. this will make your cfx account the master account for the server.
- After you link the account, you should be brought to a page called SERVER DEPLOYER, this is where you build your server.
- Create a name for your server! The name has to be short, This name will only show on your console it will also show as the status for whatever discord bot you hook via txadmin settings.
- After you create the name, it’s going to ask for the platform you are building the server off of. (i.e. template) you want to click Popular Templates > CFX Default. This will create a FX Standalone server.
- After clicking next, it should ask for a path to put resources and the server.cfg. It should automatically be configured, however, if you have to put a custom path, put it in the box.
- Same for the next step.
- Next it’s going to ask for a license key. Look at the section called “HOW TO CREATE A LICENSE KEY” for creating the key, after you have the key created, you want to put it in the box and click RUN
License Key
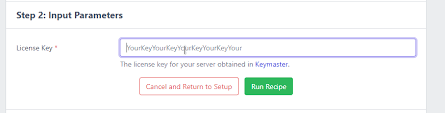
- Click run recipe
- You shouldn’t have to do anything with the server.cfg, so just click next / run.
 How to create your license key for the server:
- Go to the following website → here
- Login to your cfx account.
- Once you’re on the dashboard, go to the NEW SERVER.
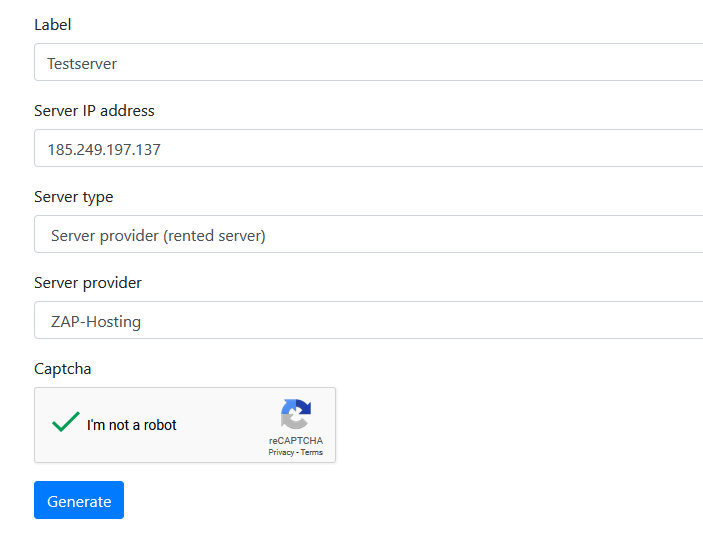
- Put a display name. (This will only show on the keymaster dashboard ~ Put it to something you’d remember!)
- Keymaster IP Config:
- IF you’re using Home Hosted - You want to put the IP as your IPv4 address which you can find here → WhatIsMyIP (This is what players are going to use to connect to you!)
- IF you’re using a VPS / Dedicated hosting - You want to use the VPS IP! It’s the address you use to connect to the vps itself. (It will show above in a BLUE bar when you’re connected to the vps.
- Down below there is a dropdown box, for VPS hosting - choose VPS, however, if you are home hosting this server, you want to choose Other/Home hosted!
- There should be another box that shows up, these are the 2 options you want to put into the box:
- Home Hosted: Home Hosted
- VPS Hosting: Provider Name (For Example: SilverHosting)
 How to port forward your server:
Server’s ports available:
TXAdmin Console Port: 40120
FXServer Port: 30120
VPS Hosting:
-
FXServer: TCP - 30120
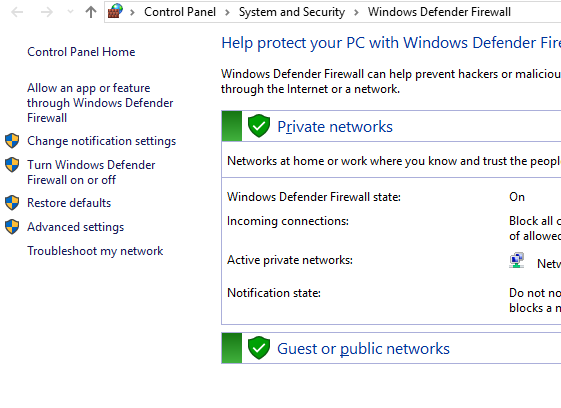
- Open up the windows Firewall → Windows Key → Search for FIREWALL → hit enter.
- Click ADVANCED SETTINGS on the left side of the screen.
- Click INBOUND RULES on the left side of the panel.
- Click NEW RULE on the right side of the panel.
- On the popup menu, click the bubble for PORT and then click next.
- Click TCP and then after that put the # 30120 in the open box on the bottom of the panel, then click next.
- Make sure that ALLOW THE CONNECTION is selected, if it is click next.
- Make sure the 3 boxes are checked and click next.
- After those steps give the connection a name. (For example: FiveM-TCP-30120)
-
FXServer: UDP- 30120
- Open up the windows Firewall → Windows Key → Search for FIREWALL → hit enter.
- Click ADVANCED SETTINGS on the left side of the screen.
- Click INBOUND RULES on the left side of the panel.
- Click NEW RULE on the right side of the panel.
- On the popup menu, click the bubble for PORT and then click next.
- Click UDP and then after that put the # 30120 in the open box on the bottom of the panel, then click next.
- Make sure that ALLOW THE CONNECTION is selected, if it is click next.
- Make sure the 3 boxes are checked and click next.
- After those steps give the connection a name. (For example: FiveM-UDP-30120)
-
txAdmin: TCP - 40120
- Open up the windows Firewall → Windows Key → Search for FIREWALL → hit enter.
- Click ADVANCED SETTINGS on the left side of the screen.
- Click INBOUND RULES on the left side of the panel.
- Click NEW RULE on the right side of the panel.
- On the popup menu, click the bubble for PORT and then click next.
- Click TCP and then after that put the # 40120 in the open box on the bottom of the panel, then click next.
- Make sure that ALLOW THE CONNECTION is selected, if it is click next.
- Make sure the 3 boxes are checked and click next.
- After those steps give the connection a name. (For example: txAdmin-TCP-40120)
-
txAdmin: UDP- 40120
- Open up the windows Firewall → Windows Key → Search for FIREWALL → hit enter.
- Click ADVANCED SETTINGS on the left side of the screen.
- Click INBOUND RULES on the left side of the panel.
- Click NEW RULE on the right side of the panel.
- On the popup menu, click the bubble for PORT and then click next.
- Click UDP and then after that put the # 40120 in the open box on the bottom of the panel, then click next.
- Make sure that ALLOW THE CONNECTION is selected, if it is click next.
- Make sure the 3 boxes are checked and click next.
- After those steps give the connection a name. (For example: txAdmin-UDP-40120)
Home Hosting:
-
FXServer: TCP - 30120
- Open up the windows Firewall → Windows Key → Search for FIREWALL → hit enter.
- Click ADVANCED SETTINGS on the left side of the screen.
- Click INBOUND RULES on the left side of the panel.
- Click NEW RULE on the right side of the panel.
- On the popup menu, click the bubble for PORT and then click next.
- Click TCP and then after that put the # 30120 in the open box on the bottom of the panel, then click next.
- Make sure that ALLOW THE CONNECTION is selected, if it is click next.
- Make sure the 3 boxes are checked and click next.
- After those steps give the connection a name. (For example: FiveM-TCP-30120)
-
FXServer: UDP- 30120
- Open up the windows Firewall → Windows Key → Search for FIREWALL → hit enter.
- Click ADVANCED SETTINGS on the left side of the screen.
- Click INBOUND RULES on the left side of the panel.
- Click NEW RULE on the right side of the panel.
- On the popup menu, click the bubble for PORT and then click next.
- Click UDP and then after that put the # 30120 in the open box on the bottom of the panel, then click next.
- Make sure that ALLOW THE CONNECTION is selected, if it is click next.
- Make sure the 3 boxes are checked and click next.
- After those steps give the connection a name. (For example: FiveM-UDP-30120)
-
txAdmin: TCP - 40120
- Open up the windows Firewall → Windows Key → Search for FIREWALL → hit enter.
- Click ADVANCED SETTINGS on the left side of the screen.
- Click INBOUND RULES on the left side of the panel.
- Click NEW RULE on the right side of the panel.
- On the popup menu, click the bubble for PORT and then click next.
- Click TCP and then after that put the # 40120 in the open box on the bottom of the panel, then click next.
- Make sure that ALLOW THE CONNECTION is selected, if it is click next.
- Make sure the 3 boxes are checked and click next.
- After those steps give the connection a name. (For example: txAdmin-TCP-40120)
-
txAdmin: UDP- 40120
- Open up the windows Firewall → Windows Key → Search for FIREWALL → hit enter.
- Click ADVANCED SETTINGS on the left side of the screen.
- Click INBOUND RULES on the left side of the panel.
- Click NEW RULE on the right side of the panel.
- On the popup menu, click the bubble for PORT and then click next.
- Click UDP and then after that put the # 40120 in the open box on the bottom of the panel, then click next.
- Make sure that ALLOW THE CONNECTION is selected, if it is click next.
- Make sure the 3 boxes are checked and click next.
- After those steps give the connection a name. (For example: txAdmin-UDP-40120)
Once you finish the INBOUND RULES for both the FX Server ports and txAdmin ports, you want to redo the process again, but doing it in the OUTBOUND RULES instead of the INBOUND RULES.
Advanced Settings - Windows Firewall
 Useful links / documentation(s):
- vMenu Latest Version → Download Link (v3.5.0) | vMenu Docs
- 7-Zip (Used to open zipped files) → Download Link
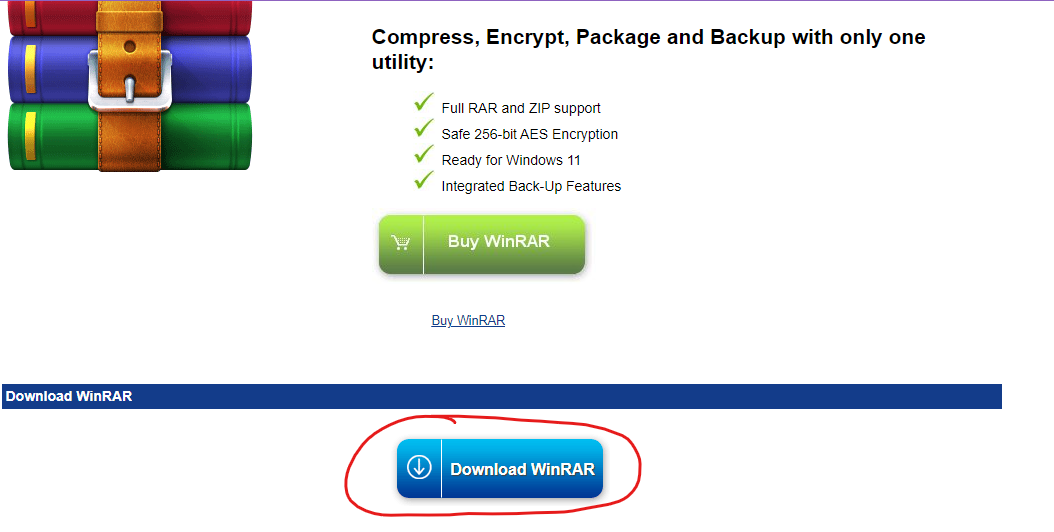
- WinRar (Used to open Zipped files) → Download Link | CLICK DOWNLOAD NOT BUY
Dependencies for using Discord Permissions
- Not I did not make any of these, these are what I use in my server! Credits to the original developers!
- DiscordAcePerms Latest Version → Link
- Badger_Discord_API Latest Version → Link
- Discord_Role_Perms Latest Version → Link
 Updating txAdmin (Using outdated Version)
- So lets see. The version you downloaded (6230) is outdated… well that’s not good. Click the link below to join their discord server and see their latest release that is supported!
- Go to channel called “txAdmin” in their discord server.
- Type “!u” to see the latest release.
- Click the WINDOWS button.
- Allow the download and then replace all server files you previously had (Files you have the FXServer.exe) and restart your server back up using the FXServer.exe file.
 Other information / posts
- How to setup Badger_Discord_API (For DiscordAcePerms) → Link
- How to setup DiscordAcePermissions (For vMenu) → Link
- How to setup vMenu permissions using discord → Link
Did this help you?
- This helped me a lot!
- This didn’t really help me at all…