This interactive airport is meant to enhance the roleplay experience by making it more immersive and is part of a project series I’m creating making public transport a pleasure to use.
Features
- Fully animated.
- Simple yet sleek UI design.
- NPC Stewardesses at key locations that can be fully customized and can even look like regular players and can be fully animated.
- Transported through cutscene. Not just a simple teleport.
- Full access to the script. No IP Lock or Obfuscation.
- Very extensive config file. Pretty much anything you need to change can be done through the config.
- Support for custom notifications. Uses mythic by default but you can change that to whatever you want by changing the export. Do not forget to change the Serverside Client events if you are changing the Notifications.
- Support for custom progress bars. Uses Chipsahoy’s Progress Bars by default but can be changed to whatever you want by changing the export.
- Bt-Target is integrated and enabled by default. To use regular markers make sure to set Config.UseEyeTracker to false.
- Code is very commented in an attempt to guide the user what parts of the code does.
- Performance friendly 0.00-0.01ms on the resmon if using the eye tracker. 0.00-0.03ms if using markers.
The UI will show available destinations based on where you are located at the time. For example the UI will not show Cayo Perico as an available destination when located at Cayo Perico.
Regarding the Stewardess NPC’s:
Please note that if you use vMenu to decide the look for them, you have to go back 1 for every Drawable Texture. For example: You wish to use Shoes 51 with texture 4, make sure you note it as:
[‘shoes_1’] = 51, [‘shoes_2’] = 3,
This is because vMenu starts at texture #1 whereas Skinchanger starts at #0.
Notes
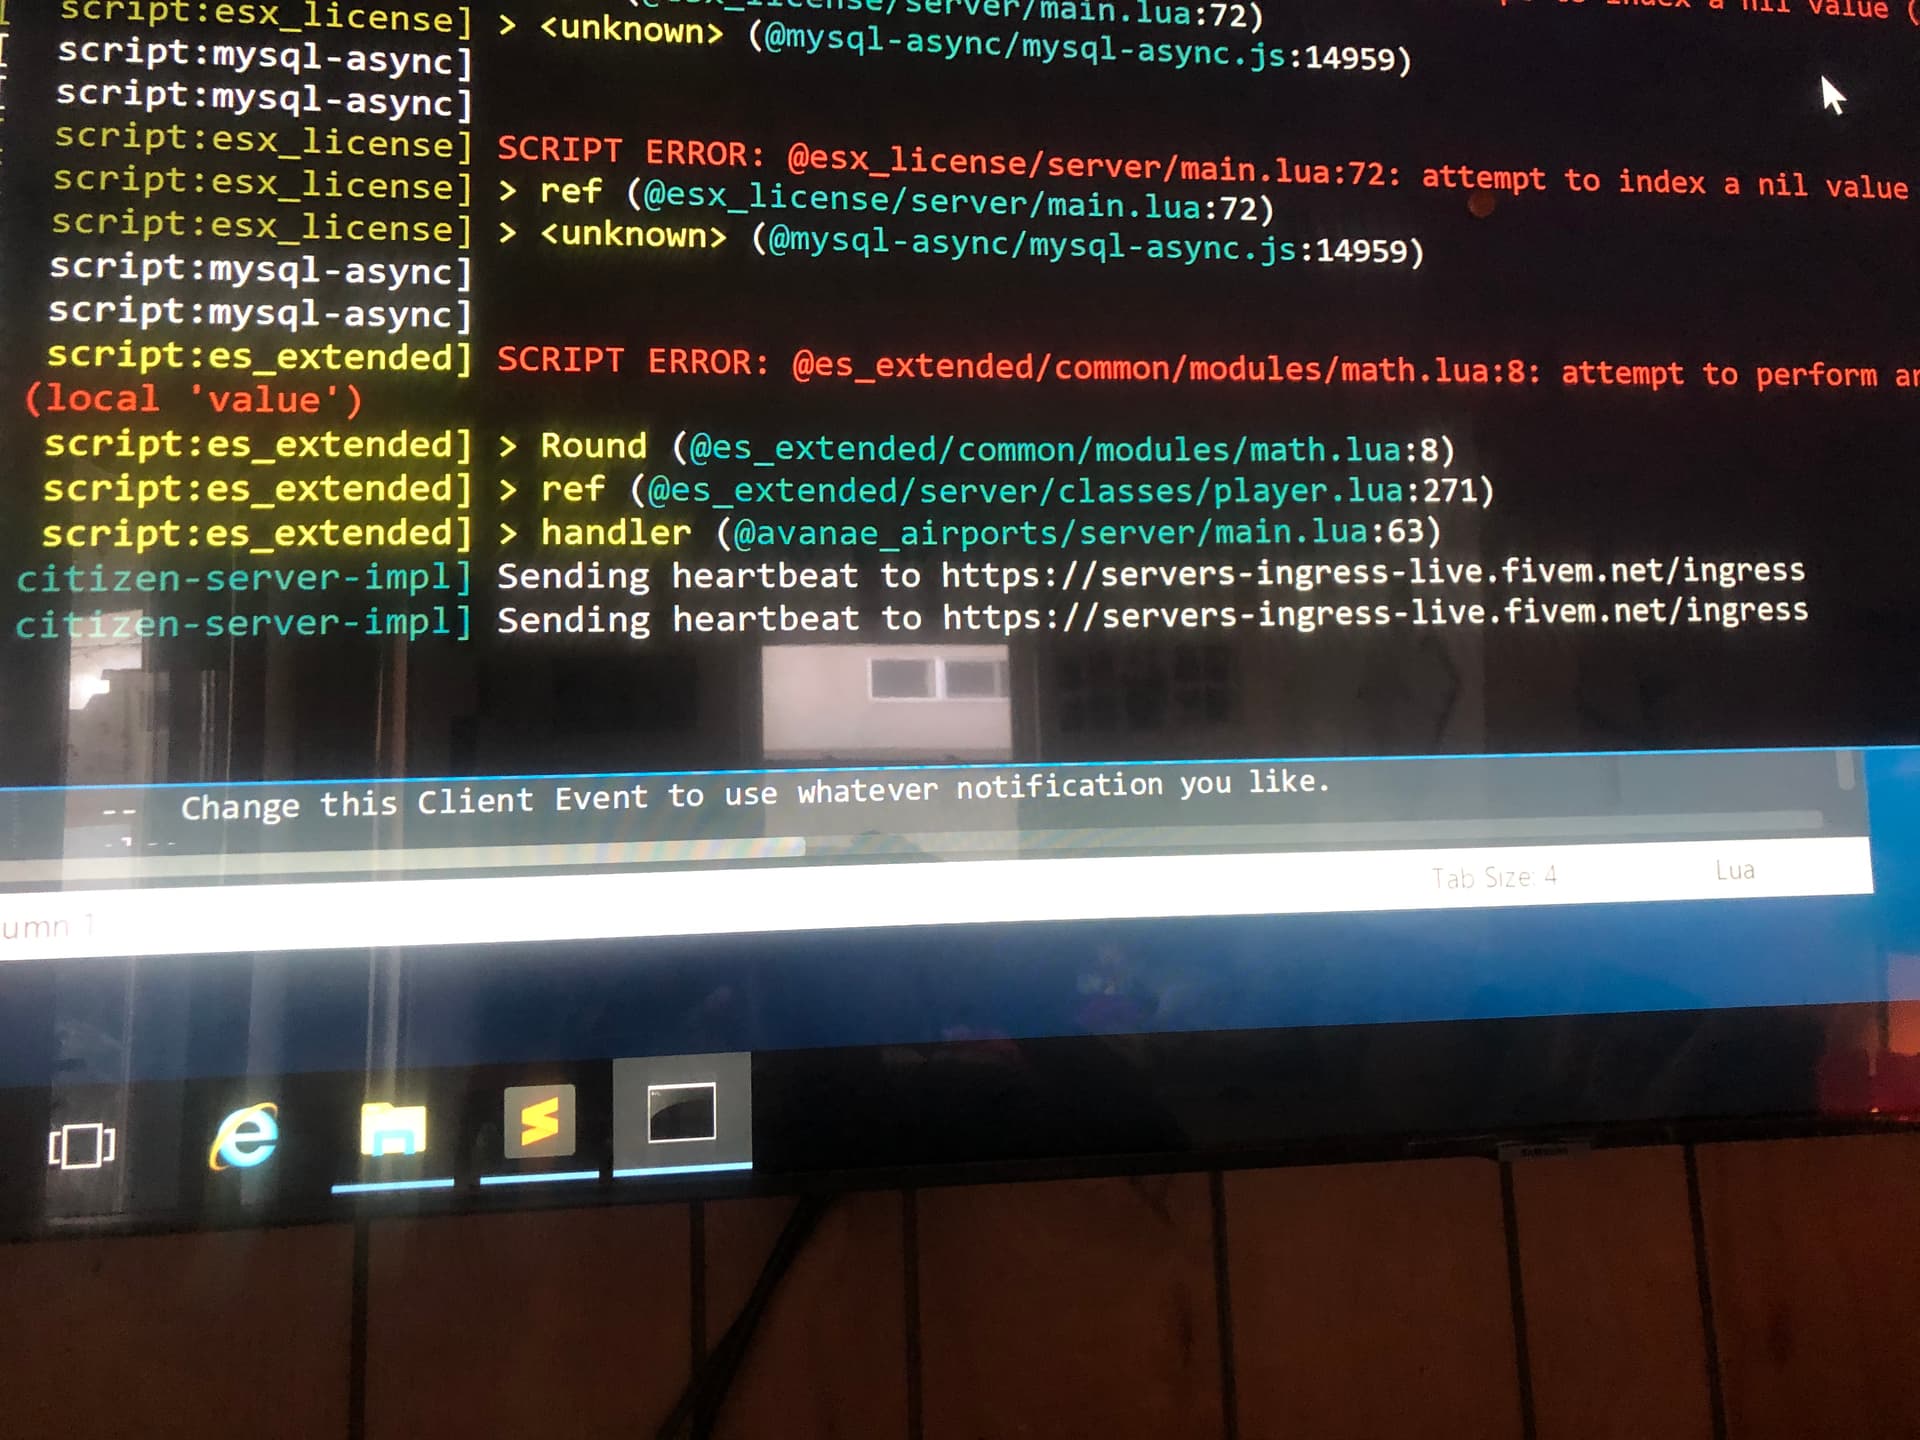
Please note that Sandy Shores does not have cutscenes (as far as I know) involving planes landing and taking off so I had to improvise this. If somebody does know a cutscene with planes leaving and entering in Sandy Shores. Please let me know and I’ll update it.
If build 2189 is used, and a player logs out on Cayo Perico, there is an extra layer of protection added to make sure players will respawn back on the island however this may fail. If it does please let me know and I’ll look into it.
To use Cayo Perico as an available destination make sure that if you are on atleast build 2189, to set Config.UseBuild2189 to true. This will ensure the island will load by using these build specific natives. If you are streaming Cayo Perico assets set Config.UseBuild2189 to false and Config.StreamingCayoPerico to true. If you are not using build 2189 and not streaming Cayo Perico assets set Config.UseBuild2189 and Config.StreamingCayoPerico to false. This will enable a popup warning that there are no flights to Cayo Perico and prevents a player from accidentally being dropped in the ocean.
Required Edits
In order to make the NPC’s work all you have to do is add a bit of code to the skinchanger script.
Copy the following code and place it somewhere within Skinchanger/Client.lua.
function CreateNPCSkin(skin, clothes, ped)
	local playerPed = ped

	for k,v in pairs(skin) do
		Character[k] = v
	end

	if clothes ~= nil then
		for k,v in pairs(clothes) do
			if
				k ~= 'sex'				and
				k ~= 'face'				and
				k ~= 'skin'				and
				k ~= 'age_1'			and
				k ~= 'age_2'			and
				k ~= 'eye_color'		and
				k ~= 'beard_1'			and
				k ~= 'beard_2'			and
				k ~= 'beard_3'			and
				k ~= 'beard_4'			and
				k ~= 'hair_1'			and
				k ~= 'hair_2'			and
				k ~= 'hair_color_1'		and
				k ~= 'hair_color_2'		and
				k ~= 'eyebrows_1'		and
				k ~= 'eyebrows_2'		and
				k ~= 'eyebrows_3'		and
				k ~= 'eyebrows_4'		and
				k ~= 'makeup_1'			and
				k ~= 'makeup_2'			and
				k ~= 'makeup_3'			and
				k ~= 'makeup_4'			and
				k ~= 'lipstick_1'		and
				k ~= 'lipstick_2'		and
				k ~= 'lipstick_3'		and
				k ~= 'lipstick_4'		and
				k ~= 'blemishes_1'		and
				k ~= 'blemishes_2'		and
				k ~= 'blush_1'			and
				k ~= 'blush_2'			and
				k ~= 'blush_3'			and
				k ~= 'complexion_1'		and
				k ~= 'complexion_2'		and
				k ~= 'sun_1'			and
				k ~= 'sun_2'			and
				k ~= 'moles_1'			and
				k ~= 'moles_2'			and
				k ~= 'chest_1'			and
				k ~= 'chest_2'			and
				k ~= 'chest_3'			and
				k ~= 'bodyb_1'			and
				k ~= 'bodyb_2'
			then
				Character[k] = v
			end
		end
	end

	SetPedHeadBlendData			(playerPed, Character['face'], Character['face'], Character['face'], Character['skin'], Character['skin'], Character['skin'], 1.0, 1.0, 1.0, true)

	SetPedHairColor				(playerPed,			Character['hair_color_1'],		Character['hair_color_2'])					-- Hair Color
	SetPedHeadOverlay			(playerPed, 3,		Character['age_1'],				(Character['age_2'] / 10) + 0.0)			-- Age + opacity
	SetPedHeadOverlay			(playerPed, 1,		Character['beard_1'],			(Character['beard_2'] / 10) + 0.0)			-- Beard + opacity
	SetPedEyeColor				(playerPed,			Character['eye_color'], 0, 1)												-- Eyes color
	SetPedHeadOverlay			(playerPed, 2,		Character['eyebrows_1'],		(Character['eyebrows_2'] / 10) + 0.0)		-- Eyebrows + opacity
	SetPedHeadOverlay			(playerPed, 4,		Character['makeup_1'],			(Character['makeup_2'] / 10) + 0.0)			-- Makeup + opacity
	SetPedHeadOverlay			(playerPed, 8,		Character['lipstick_1'],		(Character['lipstick_2'] / 10) + 0.0)		-- Lipstick + opacity
	SetPedComponentVariation	(playerPed, 2,		Character['hair_1'],			Character['hair_2'], 2)						-- Hair
	SetPedHeadOverlayColor		(playerPed, 1, 1,	Character['beard_3'],			Character['beard_4'])						-- Beard Color
	SetPedHeadOverlayColor		(playerPed, 2, 1,	Character['eyebrows_3'],		Character['eyebrows_4'])					-- Eyebrows Color
	SetPedHeadOverlayColor		(playerPed, 4, 1,	Character['makeup_3'],			Character['makeup_4'])						-- Makeup Color
	SetPedHeadOverlayColor		(playerPed, 8, 1,	Character['lipstick_3'],		Character['lipstick_4'])					-- Lipstick Color
	SetPedHeadOverlay			(playerPed, 5,		Character['blush_1'],			(Character['blush_2'] / 10) + 0.0)			-- Blush + opacity
	SetPedHeadOverlayColor		(playerPed, 5, 2,	Character['blush_3'])														-- Blush Color
	SetPedHeadOverlay			(playerPed, 6,		Character['complexion_1'],		(Character['complexion_2'] / 10) + 0.0)		-- Complexion + opacity
	SetPedHeadOverlay			(playerPed, 7,		Character['sun_1'],				(Character['sun_2'] / 10) + 0.0)			-- Sun Damage + opacity
	SetPedHeadOverlay			(playerPed, 9,		Character['moles_1'],			(Character['moles_2'] / 10) + 0.0)			-- Moles/Freckles + opacity
	SetPedHeadOverlay			(playerPed, 10,		Character['chest_1'],			(Character['chest_2'] / 10) + 0.0)			-- Chest Hair + opacity
	SetPedHeadOverlayColor		(playerPed, 10, 1,	Character['chest_3'])														-- Torso Color
	SetPedHeadOverlay			(playerPed, 11,		Character['bodyb_1'],			(Character['bodyb_2'] / 10) + 0.0)			-- Body Blemishes + opacity

	if Character['ears_1'] == -1 then
		ClearPedProp(playerPed, 2)
	else
		SetPedPropIndex			(playerPed, 2,		Character['ears_1'],			Character['ears_2'], 2)						-- Ears Accessories
	end

	SetPedComponentVariation	(playerPed, 8,		Character['tshirt_1'],			Character['tshirt_2'], 2)					-- Tshirt
	SetPedComponentVariation	(playerPed, 11,		Character['torso_1'],			Character['torso_2'], 2)					-- torso parts
	SetPedComponentVariation	(playerPed, 3,		Character['arms'],				Character['arms_2'], 2)						-- Amrs
	SetPedComponentVariation	(playerPed, 10,		Character['decals_1'],			Character['decals_2'], 2)					-- decals
	SetPedComponentVariation	(playerPed, 4,		Character['pants_1'],			Character['pants_2'], 2)					-- pants
	SetPedComponentVariation	(playerPed, 6,		Character['shoes_1'],			Character['shoes_2'], 2)					-- shoes
	SetPedComponentVariation	(playerPed, 1,		Character['mask_1'],			Character['mask_2'], 2)						-- mask
	SetPedComponentVariation	(playerPed, 9,		Character['bproof_1'],			Character['bproof_2'], 2)					-- bulletproof
	SetPedComponentVariation	(playerPed, 7,		Character['chain_1'],			Character['chain_2'], 2)					-- chain
	SetPedComponentVariation	(playerPed, 5,		Character['bags_1'],			Character['bags_2'], 2)						-- Bag

	if Character['helmet_1'] == -1 then
		ClearPedProp(playerPed, 0)
	else
		SetPedPropIndex			(playerPed, 0,		Character['helmet_1'],			Character['helmet_2'], 2)					-- Helmet
	end

	if Character['glasses_1'] == -1 then
		ClearPedProp(playerPed, 1)
	else
		SetPedPropIndex			(playerPed, 1,		Character['glasses_1'],			Character['glasses_2'], 2)					-- Glasses
	end

	if Character['watches_1'] == -1 then
		ClearPedProp(playerPed, 6)
	else
		SetPedPropIndex			(playerPed, 6,		Character['watches_1'],			Character['watches_2'], 2)					-- Watches
	end

	if Character['bracelets_1'] == -1 then
		ClearPedProp(playerPed,	7)
	else
		SetPedPropIndex			(playerPed, 7,		Character['bracelets_1'],		Character['bracelets_2'], 2)				-- Bracelets
	end
end

RegisterNetEvent('skinchanger:loadPedSkin')
AddEventHandler('skinchanger:loadPedSkin', function(ped, skin)
	CreateNPCSkin(skin, nil, ped)
end)
Save skinchanger and that’s it!
It should work perfectly, and it should not interfere with the regular working of skinchanger and esx_skin. I myself don’t use ESX Legacy, so while during testing worked perfectly, I’m still not 100% sure about the overall result. Please let me know ![]()
Installation Instructions
- Place ‘avanae_airports’ in your resource folder.
- Place ‘ensure avanae_airports’ in your config.
- Follow the instructions in Required Edits
- This script should support every version of ESX. However due to the amount of different versions of the item table in the database based on so many different inventories (weight or limit based) , a SQL has not been provided. To ensure everything working correctly you need to go to your database, go to “ITEMS” and insert ‘planeticket_lsia’, ‘planeticket_ssa’ and ‘planeticket_cpa’ as items and you should be good to go.
- Start your server and profit.
Config
The config is quite extensive and almost anything you want to adjust can be done through the config.
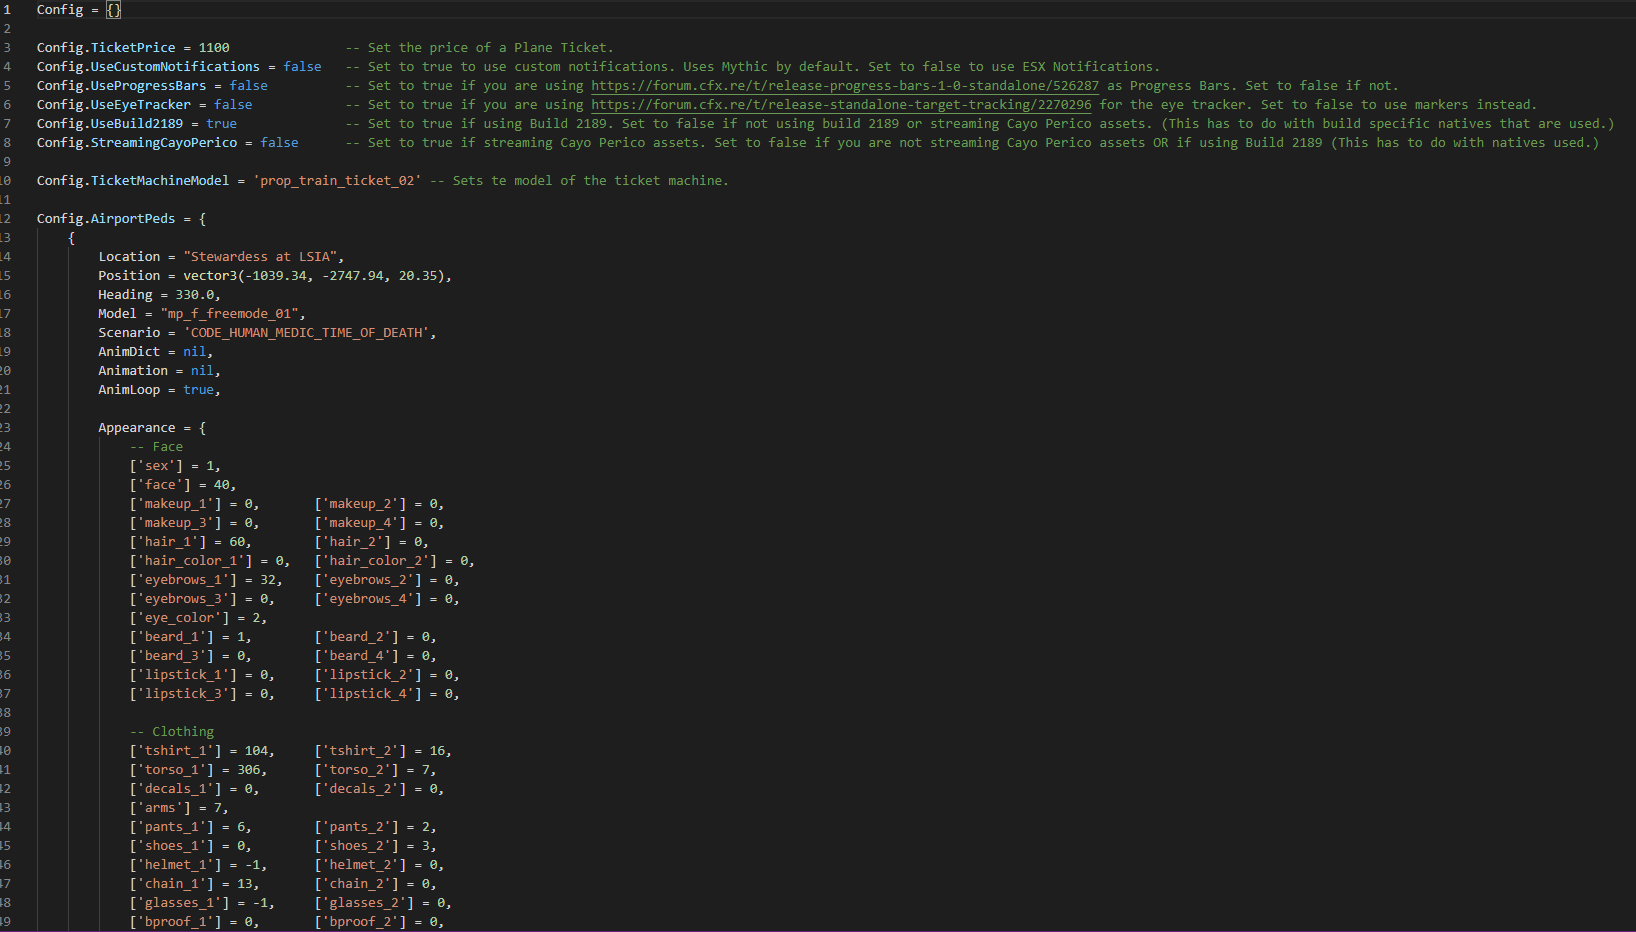
A quick run down of what every option does:
-
Config.TicketPrice - Self explanatory. Set the price of a ticket globally.
-
Config.UseCustomNotifications - Set this to true to use custom notifications or false to use ESX Notifications. By default this uses Mythic Notify, but if you use your own, you can find the client and server events to change to your own notification system.
-
Config.UseProgressBars - Use progress bars during animations and interactions. This uses Chipsahoy’s Progress Bars by default but the export can be changed to whichever system you use.
-
Config.UseEyeTracker - Bt-Target is already set-up and integrated into the script and ready to use. If you don’t use the eyetracker, set this to false to use markers.
-
Config.UseBuild2189 - If you don’t stream Cayo Perico assets, but are on Build2189, set this to true. This will allow the island to load, and enables Cayo Perico as a destination.
-
Config.StreamingCayoPerico - If you are not on Build 2189, but you are streaming Cayo Perico assets then set this to true. This makes sure that Cayo Perico is an available destination.
-
Config.TicketMachineModel - Sets the model for the spawned ticket machines. You can change this but it’s recommended that you don’t.
-
Config.AirportPeds - Allows you to completely change the look of your Stewardess peds and even make them look like actual players, and you can let them play animations too. I have already set them up but they can be changed as you wish.
Possible future plans
I might consider implementing AI pilots to fly you to your destination.
I am also considering making Standalone and support QBus.

You can find the script on my Tebex Store for €6,99
Should any of you have any feedback or things I can add to it, do let me know. ![]()
As this is my first paid resource, please note that all updates will be free.
Updates
Update 1.0.1 Released:
- Cleaned up left-over code that could result in duplication of NPC’s after each flight.
- Added Config.Cutscene that allows enabling or disabling cutscenes all together.
Update 1.0.2 will include full landing, mid-air and take-off cutscenes.
Bug fix for Update 1.0.1 Released:
- Fixed an instance where your character was stuck trying to buy a ticket with no money.
- Hopefully fixed an instance where a player could buy a ticket with no money on a fresh server start without resource restart.
Updating ESX Version
If you’ve updated to a few of the latest ESX Legacy it will warn you about esx:getSharedObject being deprecated or it already is deprecated you need to make a couple of edits
Client Side
ESX = nil

Citizen.CreateThread(function()
	while ESX == nil do
		TriggerEvent('esx:getSharedObject', function(obj) ESX = obj end)
		Citizen.Wait(0)
	end

	while ESX.GetPlayerData().job == nil do
		Citizen.Wait(10)
	end

	ESX.PlayerData = ESX.GetPlayerData()
end)
and change that to
ESX = exports['es_extended']:getSharedObject()

Citizen.CreateThread(function()
	while ESX.GetPlayerData().job == nil do
		Citizen.Wait(10)
	end

	ESX.PlayerData = ESX.GetPlayerData()
end)
Server Side
ESX = nil

TriggerEvent('esx:getSharedObject', function(obj) ESX = obj end)
to
ESX = exports['es_extended']:getSharedObject()
Make sure your fxmanifest includes
shared_scripts {
  '@es_extended/imports.lua',
}